 Learning Objectives:
Suggested time: 100 mins Starter: Students asked to research storage devices and list as many different types as they can. After 5 minutes students, chosen at random, to list one device they found. Part 1: Introduction For my third lesson, I decided to investigate Secondary Storage devices. I began by explaining the main 3 types of storage technologies: Optical, Magnetic and Solid State. I started with Magnetic storage devices and showed students an extract from RI Christmas Lecture 2008, Lecture 3: The Ghost in the machine, part 2 (explanation of how a hard disk works) – Fast forward to 12 min 30 sec. [Alternative: How a hard drive works]. I followed this by explaining optical devices and showed them a video showing how a CD works. I finished by explaining Solid State drives. After a brief explanation of each of the 3 methods, I showed students a comparison table (See below) and compared some of the features (Capacity, speed, portability, durability and reliability). I finished by showing students a clip from the Gadget Show in which the presentors test the durability of different storage devices. Part 2: Research (Revision wiki) After a brief introduction to storage devices, I instructed students to conduct some research into different storage devices and collect their finding in a table (provided). Upon completion, students were asked to upload their finished tables to their teams wiki. (See below) 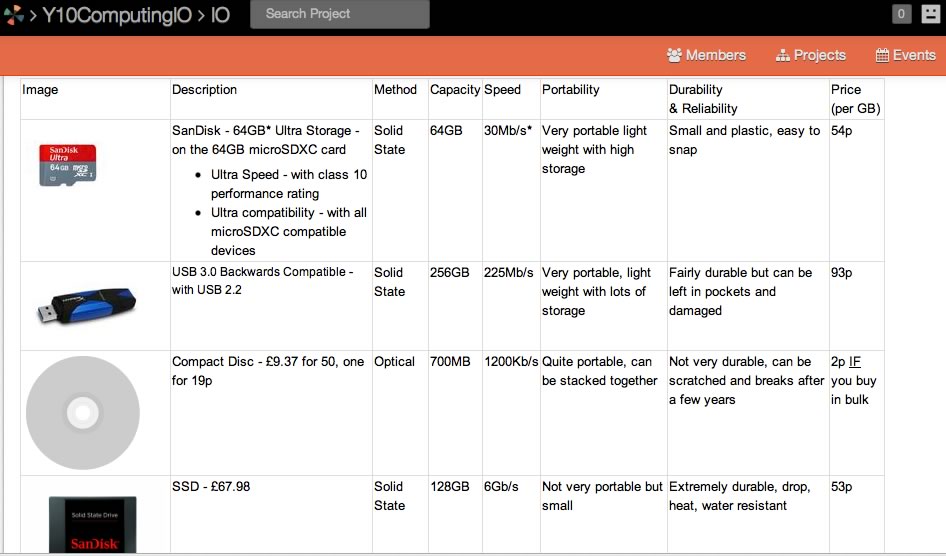
Example student wiki - Storage comparison table. Part 3: Top Trumps After about 15 minutes, I emailed students a Top Trumps template I created in Microsoft Word (See below). Alternatively, students can use an online Top Trumps generator like Trading Card Creator. I then challenged each team to create 8 Top Trumps cards with the following criteria: Medium, capacity, speed, portability, price per Gb and reliability / durability. I also asked students to include an image of their chosen storage device (See example below). 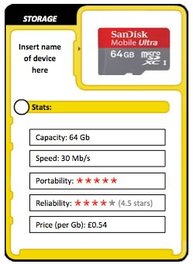
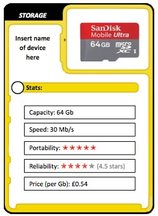
Example Top Trumps Card
Note: To make sure students used the same criteria to measure reliability and portability, I gave them the following comparison table: 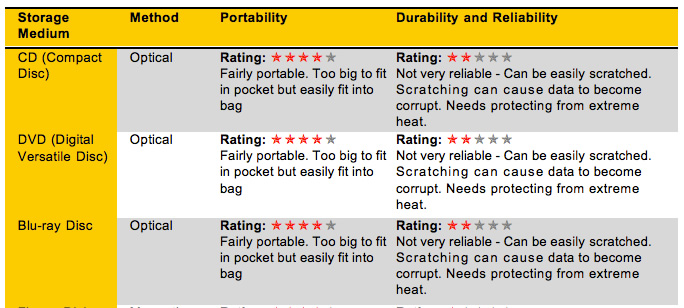
Click on the links below for the full table.
Finally, to make sure students didn’t cheat on price per Gb, I banned them from using auction sites and third party re-sellers. Plenary: Play Top Trumps After each team had printed and cut out their Top Trump cards, I explained the rules (See below) and gave a quick demonstration with the help of two volunteers. After a quick practice, we played the game. Hint: The game works best with 3 teams however, if you have more than 3 teams, you could play more than one round with the winner of each round playing against each other in the final. Tip: To avoid arguments, you can use a Random Name Selector to decide which team goes first. Rules:
Homework: Past paper questions. Alternatives:
Top Trumps: Instead of Top Trumps, you could instruct students to create a Spreadsheet or Database comparing different storage devices.  Friday was my first GCSE computing lesson with year 10. Fortunately, at the end of last term, I was able to acquire some old desktop computers that were due to be retired to the big scrap heap in the sky. So, with screwdrivers in hand, I thought i would start off by allowing the students to take a look inside a computer. The objectives of the lesson where for students to:
Suggested time: 100 mins Starter I started by asking students how many computers they thought they had in their homes. (Based on the Royal Institute Christmas Lectures 2008: Chips with everything). I used edmodo (www.edmodo.com) to create an online poll. (See results below.) Alternatively, you could use your existing classroom response system or favourite Web 2.0 tool. (See alternatives below.) 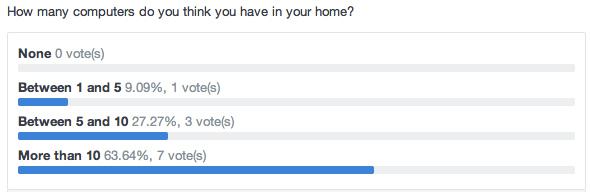 Just under 64% of pupils thought they had more than 10 computers in their home. After discussing the results of the poll, I then informed students that the average household contained over 100 computers and explained what the characteristics of a computer system are. I then challenged the students to list as many computer systems they could possibly think of in an average household. Challenge 1 After discussing the students answers, I explained the four basic components that make up a computer system – Input, Process, Output and Storage. I then challenged the students to conduct some research on these three areas, the results of which would be used to create a class wiki the following lesson. Challenge 2 After reviewing some of the students research, I decided to let them loose on the old computers. Students were put into groups of 3, each group armed with a screwdriver and iPad. They were then instructed to take their computer apart - remembering where each part goes as they had to put them back together ready for the next class. As well as taking the computers apart, students had to photograph each component and explain briefly its purpose. Students were allowed to use whichever tool they wished to record their findings. These included tools such as: Skitch (iPad), Explain Everything (iPad), iMovie (Mac) or Movie Maker, iPhoto (Mac) or PhotoStory, and PowerPoint or Word etc. To help them along their way, I uploaded some resources to edmodo (see links below). Some students even had a go at using Morfo (www.morfoapp.com) to create talking computer components. Useful Links: Your PC, inside and out: Part 1 (Free download courtesy of makeuseof.com) In this guide Lachlan Roy breaks the computer down into its different components. For each component he describes its function, talks about best brands on the market, explains the different specifications to look out for and provides a bit of history, too. Part 1 focusses on the motherboard. Your PC, inside and out: Part 2 (Free download courtesy of makeuseof.com) Part 2 highlights everything you need to know about CPUs, storage devices, memory, graphics cards and other computer components. Examples of student's work: A talking hard disk drive created using Morfo 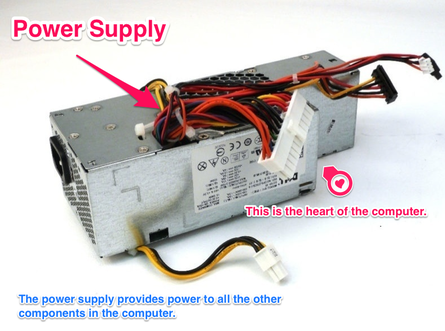 A brief description of the power supply using Skitch This is what the students collectively produced: Slideshow created using iPhoto (See alternatives to iPhoto below) Plenary After reviewing the students work, we finished off by playing a game of "You Say, We Pay" - Inside a Computer. If you have never played the game before, this is a game borrowed from from the 'Richard and Judy Show'. The aim of the game is for one student (Blind folded or back turned to the computer screen) to guess what pictures are being displayed on the screen using only descriptions from other students (Other students are not allowed to use the word or use words that rhyme). For a little extra competition, you can also split the class into two and take it in turns to see which team can get the most correct answers (without cheating) - See PowerPoint below:
Alternatives As promised, each week I will provide alternative suggestions for some of the activities in each lesson. Here are my alternative suggestions for this weeks lesson: Poll: Instead of using edmodo (www.edmodo.com) to conduct a poll, you could also use socrative (www.socrotive.com) or infuse learning (www.infuselearning.com). (For other alternatives, see my blog on online response systems). Alternatively, you could just ask for a show of hands. Slideshow: If you don't have access to iPhoto (Mac) you could also use Movie Maker, PhotoStory or Animoto (www.animoto.com) Keywords  |
AuthorSimon Johnson 
Microsoft Innovative Educator Expert / MIE Trainer

Minecraft Cert. Educator / Global Mentor

CAS Master Teacher

Raspberry Pi Cert. Educator

Tickle Ambassador
Archives
June 2017
CategoriesAll Algorithms Cpu Fundamentals Hardware Input & Output Memory OCR A451 Software Storage |
||||||||||
Search by typing & pressing enter
 RSS Feed
