 With no lesson this week due to inset, I thought I would take a look at how you can make the most of your computing lessons. Even if you are lucky enough to have two hours or more a week to deliver your computing lessons, you may feel there is not enough time to cover everything. One of things I have started to do, to make best use of class time, is to flip my classroom. What is classroom flipping? If you are new to the idea of the flipped classroom, the concept is simple: the flipped classroom essentially reverses the traditional way of teaching i.e. what is usually done in the classroom, such as lectures, is done as homework and what is usually done as homework is done in the classroom. The benefit of this model, particularly for teaching Computer Science, is that the teacher can spend more time interacting with students. There are many ways to facilitate classroom flipping. In this post I explore some of these ways and look at tips for getting the most out your flipped classroom. 1. Video Tutorials Otherwise known as vodcasting, the most common way to flip your classroom, is to use teacher created videos which students can view outside of the classroom. There are several ways that you can share your videos with your students – probably the most popular being YouTube (www.youtube.com) however, you can also use other video sharing sites such as SchoolTube (http://www.schooltube.com), TeacherTube (http://www.teachertube.com), or if your school has one, your schools own VLE. The added bonus of using video sharing sites such as YouTube is that videos can be grouped into playlists and embedded into any web based tools such as the school's VLE, wiki, blog or website. You can also add useful videos from other contributors to build your playlists. Students can follow the lecture for homework and use lesson time to explore concepts in more detail. For examples of how you can use video tutorials to flip your computing classroom, visit Mark Clarkson's YouTube Channel: (http://www.youtube.com/user/mwclarkson) 2. Wikis A wiki allows groups of people to collaboratively develop websites with no prior knowledge or experience of website design. In the flipped classroom, a wiki can be used to host instructional videos and associated resources to introduce a concept or deliver a lesson. Students can then update the wiki and summarize what they have learned. Free tools such as PBWorks (http://pbworks.com/education) and Wikispaces (http://www.wikispaces.com) are ideal for creating classroom wikis. Wikispaces Classroom builds on the collaborative editing features of a wiki but includes some additional functionality to support the flipped classroom, features such as social interaction and formative assessment. Teachers can also monitor how often a student has read, edited or saved a page. To find out more about how to use wikis in your classroom, click here. 3. Blendspace This powerful web 2.0 tool allows you to organize and share content such as videos, images, documents and text using its intuitive drag and drop interface. The tool also allows you to create online lessons by embedding content from popular sites such as YouTube, Google, Vimeo, Flickr etc via its built-in search tool. You can also upload content from your computer, Dropbox or Google Drive. Blendspace is ideal for flipping your classroom – students can research a topic at home and use lesson time more effectively. As a teacher you can monitor students progress and measure students understanding with the built-in quiz creation tool. You can even check to see if your students have actually viewed the resources you have shared with them. 4. Podcasting Podcasts are a wonderful way of allowing both teacher and students to share their work and experiences with a potential huge audience over the Internet. A podcast is like a radio show however, instead of being broadcast live, a podcast is pre-recorded and then distributed over the internet or to a mobile device allowing your students to listen to them when and where they please, even on the bus ride home. There are plenty of ways to share your podcast, probably one of the most famous being iTunes however, another tool worth considering is Audioboo. Audioboo is a free social-podcasting environment. With Audioboo, students and teachers can create podcasts (or boos) which can be shared with other social teaching tools such as edmodo. Probably the best example of using podcasts to support the teaching of Computer Science are those by Alan O’Donohoe: http://audioboo.fm/users/104685/boos 5. Learning to code online With online tools such as CodeAcademy (http://www.codecademy.com), LearningStreet (http://www.learnstreet.com) and Khan Academy (http://www.khanacademy.org/cs), it has never been easier to learn how to code and now, thanks to such tools, it's never been easier to flip your computing classroom. Using the flipped classroom model, students can learn the basic syntax outside the classroom thus allowing the teacher to use classroom time for problem solving and supporting students with practical tasks. Tips for flipping your classroom:
I’m not going to lie to you, flipping your classroom is not without it’s pitfalls however, get it right, and the results can be extremely rewarding. Here are some tips to help you along your way:
In my seventh lesson, I decided to explore the different types of memory. Learning Objectives:
Lesson 1: RAM and ROM Suggested time: 50 mins Starter: I started with an activity adapted from a resource I found on CAS courtesy of Philip Upstone – “Main Memory - Kinaesthetic Activity”. You can find the original here: (http://community.computingatschool.org.uk/resources/938). In this activity, students move around the room simulating the transfer of data between various storage locations such as RAM, Cache memory, Secondary Storage and Virtual memory. Resources:
Place these posters around the classroom (see diagram) at the start of the lesson.
Cut out and hand these out to students at the start of the activity. Main task: I started by explaining the difference between volatile and non-volatile memory. I then displayed, on the whiteboard, images of different types of memory and asked the students to try to identify each of the images and decide if was volatile or non-volatile. I then showed them two videos from Cambridge GCSE Computing Online – “The difference between RAM and ROM – Part A”: http://www.youtube.com/watch?v=URYPErhTkMY & “The difference between RAM and ROM – Part B”: http://www.youtube.com/watch?v=IbAbhuTELWE I introduced the next activity using a Voki (http://www.voki.com). A Voki is a free service that allows you to create personalised speaking avatars and use them on your blog, website, and in email messages. I used the voki to instruct the students to, in their teams, complete the following task (See the voki I used below): 1. Create a Voki to describe one of the following: a. RAM b. ROM c. Flash Memory d. Virtual Memory Include in your description: a) What it’s used for b) What it stores c) What happens when it loses power 2. Explain why having higher amounts of RAM can speed up your system. (Above) Voki I used to introduce the main task. I followed this by directing the students to wikispaces and instructed them to create a new page in their revision wiki called Memory and embed their completed voki. Resources: Students were given the following links to help them complete their task: The difference between RAM and ROM – Part A (Cambridge GCSE Computing Online): http://www.youtube.com/watch?v=URYPErhTkMY The difference between RAM and ROM – Part B (Cambridge GCSE Computing Online): http://www.youtube.com/watch?v=IbAbhuTELWE GCSE Computing.net – Memory: http://gcsecomputing.net/wp-content/uploads/2012/01/OCR%20A451%202.1.2%20Memory%20-%20Summary.pdf Teach-ICT – Memory: http://www.teach-ict.com/gcse_new/computer%20systems/memory/miniweb/index.htm PWN ICT: http://www.pwnict.co.uk/computingGCSE/computingResources.html (Click on Hardware and then Memory) Plenary: Students attempted memory quizzes on teach-ict: http://www.teach-ict.com/gcse_new/computer%20systems/memory/quizzes_memory.html Alternatively: You could play a selection of students vokis to the whole class or students could attempt the “Difference between RAM and ROM activity” activity from the Cambridge GCSE Computing Online website. http://www.cambridgegcsecomputing.org/computing-hardware-main#.UmBa5RY45UQ Lesson 2: TouchDevelop Challenge
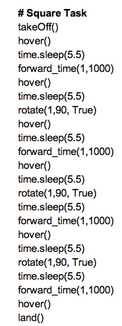
Suggested time: 50 mins (Note: Students may require an addition lesson in order to complete both tutorials) Main task: Following on from the previous week’s lesson, I asked students to load TouchDevelop (www.touchdevelop.com) on their computers and sign in with their google, microsoft or yahoo id, if they have one. If they don’t already have an email account with google, Microsoft or yahoo, I ask them to create one. Once logged in, I sent them to the TouchDevelop Challenge (www.touchdevelop.weebly.com) and asked them to click on Resources > Tutorials and attempt the Fruit Ninja clone tutorial (http://touchdevelop.weebly.com/tutorials.html). Plenary: Invited students to try out each other’s programs. As an advocate for the use of technology to support teaching and learning, I am always looking out for new and exciting ways to engage my students. In this post, I look at some popular tech toys / gadgets and explore how they can be used to support the new Computing Curriculum. 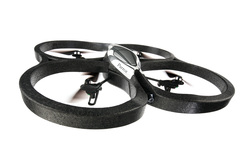 1. Parrot AR Drones What is an AR Drone? The Parrot AR Drone is a camera-equipped, smartphone and tablet controlled quadricopter. (See video below) Thanks to work by Lucas Beyer, a 15 year old student from Barcelona, it is now possible to program the AR Drone with Python script using a piece of software called Autoflight: Control your AR Drone with Python using AutoFlight. AutoFlight is a free download which features AR.Drone control with a gamepad or joystick, sensor data logging, 3d mapping, Python scripting to automate the drone's behavior and Arduino extensions. Sample script. As you can see from the sample script (above), programming the AR Drone is fairly straightforward: Connect to the drone, takeoff, hover, move forward, rotate, land etc. Price: AR Drone: Brand new, an AR Drone 2.0 is about £270 however, a second hand AR Drone 1.0 can be picked up from ebay for as little as £50. Both models can be controlled using the Autoflight software. Autoflight software: Free Download Autoflight here: http://www.lbpclabs.com/autoflight.html
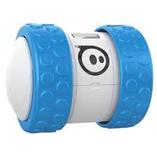
 2. Sphero & Ollie What is Sphero? Sphero is the world’s first robotic ball which you can control with your smartphone. (See video below)
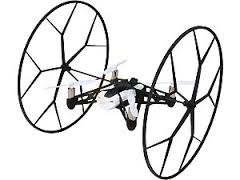
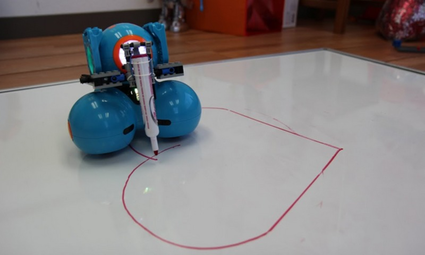
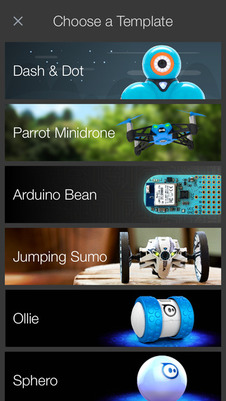
Sphero SPRK Sphero-SPRK is the latest edition to the Sphero family directly targeted for the education market. Sphero-SPRK comes with a dedicated app (SPRK app) straight out of the box designed to encourage students to code. The SPRK app lets you control the Sphero with visual blocks representing code – using their own C-based language called OVAL. Sphero also provide a series of lessons (http://www.sphero.com/education) to support the use of Sphero in the classroom designed around supporting a variety of STEM topics – including programming. http://www.sphero.com/sphero-sprk Controlling Sphero/Ollie/Parrot Rolling Spider with Tickle App As well as using the official Sphero apps to control Sphero and Ollie, you can also use free third party apps such as Tickle App (iOS). With Tickle App (see Apps), you can seamlessly connect to a number of physical devices such as Arduino, Dash & Dot, Sphero, Ollie, Parrot mini drones Rolling Spider & Jumping Sumo, and Philips Hue smart lighting systems and program them from your iPad using a ‘Scratch-like’ interface. (Note: Some devices require an iPad 3/iPad mini or above). Price: Sphero: £100. Sphero-SPRK: $129 (Currently only available in US - Educational discounts also available). Ollie: £80. Tickle App: Free  3. Dash & Dot Dot and Dash are educational toy robots that help kids learn to code through play. Designed to appeal to younger students, Dash & Dot can be programmed via a number of free apps including Blockly for Dash & Dot (iOS/Android) and Tickle App (iOS only). Both Dash and Dot are also compatible with Lego (including Lego MindStorm) which allow you to customise your robot e.g. add a pen holder to turn your robot into a Turtle etc. There are also a number of accessories available for both Dash & Dot including a phone holder and xylophone. Visit the official website to find out more: https://www.makewonder.com/robots/dashanddot Use the included Lego attachment to customise your robot! Price: Dash: £150 Dash & Dot Pack: £190 Dash & Dot Wonder Pack (includes ): £240 Blockly for Dash & Dot App: Free Tickle App: Free
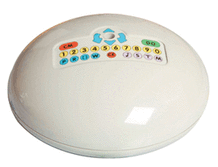
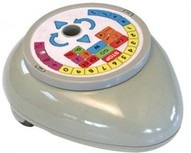
Note: Roamer has now been replaced by Roamer-Too.
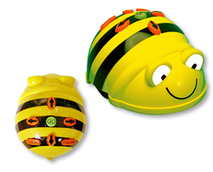
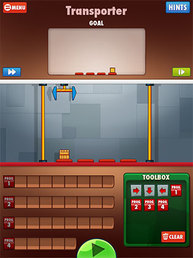
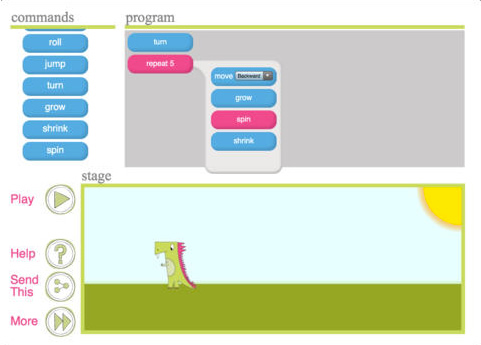
 8. iPad Why iPad? With several tablet devices available on the market, you may be asking the question, why have I singled out the iPad? The reason for this is due to a couple of recent apps that have been developed, primarily for iOS, to teach programming. 1. Cargo-bot Cargo-bot is a fun and challenging game designed to teach programming. The idea is simple; players have to program a crane to move boxes back and forth between platforms. The player controls the crane using blocks (Up, Down, Left, Right) which they must place in the correct sequence however, there is only a limited number of spaces to place the blocks meaning that the player is forced to create sub-routines (progs) to optimise the sequence of instructions. The challenge is to move the crane using the least number of instructions. Stars are awarded for the number of instructions used – The more optimised the instructions, the more stars the player is awarded. Cargo-bot - Fun and challenging game designed to introduce programming concepts. 2. Daisy the Dinosaur Daisy the Dinosaur is a free iOS app designed for younger children to introduce programming concepts such as sequences, loops and events. The app uses an easy-to-use drag and drop interface to control Daisy in order to complete various challenges. Learn the basics of computer programming with Daisy the Dinosaur! Publisher: Hopscotch Technologies Price: Free 3. Bee-Bot App The new Bee-Bot App from TTS Group has been developed based on our well-loved, award-winning Bee-Bot floor robot. The app makes use of Bee-Bot's keypad functionality and enables children to improve their skills in directional language and programming through sequences of forwards, backwards, left and right 90 degree turns. The app has been developed with 12 levels encouraging progression. Each level is timed and the faster it is completed the more stars you get! The levels are set in an engaging garden scenario and will appeal from age 4 upwards. Note: If you don't have access to a set of iPads, why not try the original Bee-Bot (see below) Publisher: TTS Group Price: Free 4. Light-bot Hour of Code Light-bot for Hour of Code is meant to introduce kids who have no experience whatsoever programming, and is all-ages friendly! That means anyone anywhere at any age can play, have fun and learn real programming logic! Light-bot is a programming puzzle game: a puzzle game that uses game mechanics that are firmly rooted in programming concepts. Light-bot lets players gain a practical understanding of basic control-flow concepts like instruction sequencing, procedures and loops, just by guiding a robot with commands to light up tiles and solve levels. Publisher: LightBot inc. Price: Free 5. ScratchJr Inspired by the Scratch programming tool, ScratchJr is is an introductory programming language that enables young children (ages 5-7) to create their own interactive stories and games. Although based on the popular Scratch (drag-and-drop) block programming environment, the ScratchJr interface has been re-designed to make it more suitable for a younger audience. Publisher: MIT Media Lab Price: Free 6. Tickle App Tickle App is a free visual programming app for the iPad/iPhone. Using a ‘Scratch style’ interface, Tickle App introduces you to code through games creation and story-telling using its built-in animations and sound. With Tickle App (see Apps), you can also seamlessly connect to a number of physical devices such as Arduino, Dash & Dot, Sphero, Ollie, Parrot mini drones, Rolling Spider & Jumping Sumo, and Philips Hue smart lighting systems. Publisher: Tickle Labs, inc Price: Free Create games, stories and control a variety of physical devices with Tickle App.
In my sixth lesson, I decided to revisit the CPU however, this time, explore the three Cs: “Clock speed”, “Cache” size and number of “Cores”. Learning Objectives:
Lesson 1: The 3 Cs Suggested time: 50 mins Starter: I started with an activity adapted from a resource I found on CAS courtesy of John Bilton (johnbiltoncomputing.blogspot.co.uk) – “CPU Dart Activity”. You can find the original here: CPU Dart Activity For those new to DART (Directed Activity Related to Text), this activity is designed to support literacy. It focuses on the strategies of skimming, scanning and gap fill. The purpose of this DART activity is to give the students a brief overview of the main features of the CPU. Instructions:
Main Task: I started by explaining the main three features to consider when purchasing a CPU: Clock speed, Cache size and number of Cores. I then showed them a video courtesy of Mark Clarkson - "Mr. Clarkson talks about… The CPU" http://www.youtube.com/watch?v=P4QmPFcBELE (Skip to 6m14s) I followed this by directing the students to wikispaces.com and instructed them to create a new page in their revision wiki called CPU. I then asked them to complete the following task: 1. Write a definition for the following terms:
2. Explain what is meant by Multi-Core processors. 3. Explain why a computer with a 4Ghz (6MB cache) processor would not be twice as fast as a 2Ghz (6MB cache) processor. Resources: Students can use the following links to help them complete their task: Mr. Clarkson talks about… The CPU: http://www.youtube.com/watch?v=P4QmPFcBELE Teach-ICT – CPU: http://www.teach-ict.com/gcse_new/computer%20systems/cpu/miniweb/index.htm PWN ICT: http://www.pwnict.co.uk/computingGCSE/computingResources.html (Click on Hardware and then CPU) Plenary: Select students at random (See blog on random name selectors) to explain what is meant by Clock speed, Cache size and number of Cores. I tend to use Pose, Pause, Pounce and Bounce. Example: Pose a question to the whole class e.g. Explain why a computer with a 4Ghz (6MB cache) processor would not be twice as fast as a 2Ghz (6MB cache) processor. Pause to give students time to digest the question and think of their answer. If the students are engaged, try holding the pause for a little while longer to build up the tension. Pounce: Quickly, select a student to answer the question. i.e. Insist the answer to the question comes from student A and possibly student B, directly and fast! Obviously, plan in your mind who you are going to direct the questions to before hand. Bounce the question or student's response on to another student (immediately after the pounce). e.g. Ask them if they agree with the students previous answer and to explain why. For more information about the Pose, Pause, Pounce and Bounce technique, visit: @teachertoolkit - http://teachertoolkit.me/2013/01/04/pppb-version2/ Lesson 2: TouchDevelop Challenge Suggested time: 50 mins Main task: Following on from the previous week’s lesson, I asked students to load TouchDevelop (www.touchdevelop.com) on their computers and sign in with their google, microsoft or yahoo id. Once logged in, I sent them to the TouchDevelop Challenge (www.touchdevelop.weebly.com) and ask them to click on TD Challenge and attempt lesson 3 and 4. (touchdevelop.weebly.com/td-challenge.html). Plenary:
To finish the lesson, I asked the students to swap seats and invited them to try out each other’s games - giving feedback where appropriate. In my fifth lesson, I decided to look at the CPU in a little more detail, exploring the three major parts: Arithmetic/Logic Unit (ALU), Control Unit (CU) and Memory. I also decided to spend a little time looking at the Little Man Computer simulation to demonstrate the fetch-execute cycle. Learning Objectives:
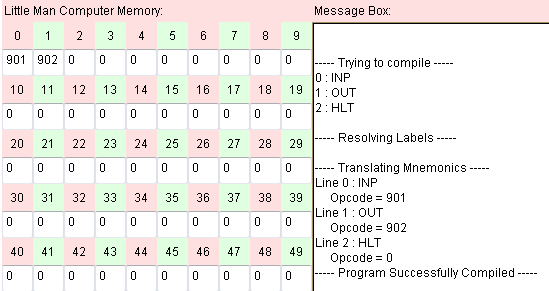
Lesson 1: Little Man Computer Suggested time: 50 mins Starter: I started with an activity, courtesy of CS Unplugged, which provides students a basic understanding of how computers work by having them act out a simple computer simulation. Each student takes on the role of a different part of a simplified computer (CPU, ALU and Display) and, working in groups of three, run a simple program. The end result of this program is to draw a picture on a simulated computer display. You download the activity here: http://cse4k12.org/how_computers_work/index.html Main: I showed students a CPU, left over from the first lesson, and explained to students that, in the starter activity, they simulated what goes on inside the CPU (All be it at a very basic level!). I then explained that we would be taking a deeper look inside the CPU using a simulation called Little Man Computer (LMC). - http://www.yorku.ca/sychen/research/LMC/LittleMan.html I loaded Little Man Computer and explained to students that the main function of the CPU is to fetch and execute the instructions. I then showed students an example set of instructions to add two numbers and loaded it into the simulator to show students how the simulator works. Note: At this point, depending on the group, you could also show students an animation showing how the fetch-execute cycle works. Here are a couple of good examples: http://www.eastaughs.fsnet.co.uk/cpu/execution-fetch.htm http://community.computingatschool.org.uk/resources/95#post_18284 (Requires you to sign up – FREE) Next, I gave students a sequence of instructions, which I printed and cut into pieces. (See attached). I asked students, in their teams, to load the Little Man Computer simulator and execute the sample program. I then asked the students to place the printed instructions in the correct order and recorder their answers on the task sheet, provided. After 5 mins, we discussed the students’ findings. After discussing the sample program with the class, I then showed them the LMC reference sheet (See attached) and explained the different instructions. Finally, I challenged the students, using the reference sheet and what they had learnt, to write a program to add 3 numbers and execute it in the LMC simulator. As an extension, I asked some students to write a program to add and subtract a number or to write a program of their own. Extension: If you are feeling really brave, you could ask the students to convert the instructions from machine code to binary. Resources:
Plenary: CPU Dingbats I finished by playing a game of CPU dingbats (See attached). This version is based on a starter activity shared via CAS by John Bilton. (Original version can be found here: http://community.computingatschool.org.uk/resources/1314). Once the students had guessed the answers correctly, I explained to them that their homework was to research each of the three keywords (Clock Speed, Core and Cache Memory) and to explain how these effect the speed of the CPU. I asked the students to use their revision wikis to record their findings.
Lesson 2: TouchDevelop Challenge
Suggested time: 50 mins Main task: Following on from the previous week’s lesson, I asked students to load TouchDevelop (www.touchdevelop.com) on their computers and sign in with their google, microsoft or yahoo id. Once logged in, I directed the students to the TouchDevelop Challenge website (www.touchdevelop.weebly.com) and challenged them to attempt lesson 2 of the TD Challenge (http://touchdevelop.weebly.com/td-challenge.html). Plenary: To finish the lesson, I asked the students to swap seats and invited them to try out each other’s scripts - giving feedback where appropriate. |
AuthorSimon Johnson Microsoft Innovative Educator Expert / MIE Trainer
Minecraft Cert. Educator / Global Mentor
CAS Master Teacher
Raspberry Pi Cert. Educator
Tickle Ambassador
Archives
June 2017
CategoriesAll Algorithms Cpu Fundamentals Hardware Input & Output Memory OCR A451 Software Storage |
||||||||||||||||||||||||||||||||||||||||||||||||||
Search by typing & pressing enter




 RSS Feed
