|
Learning Objectives:
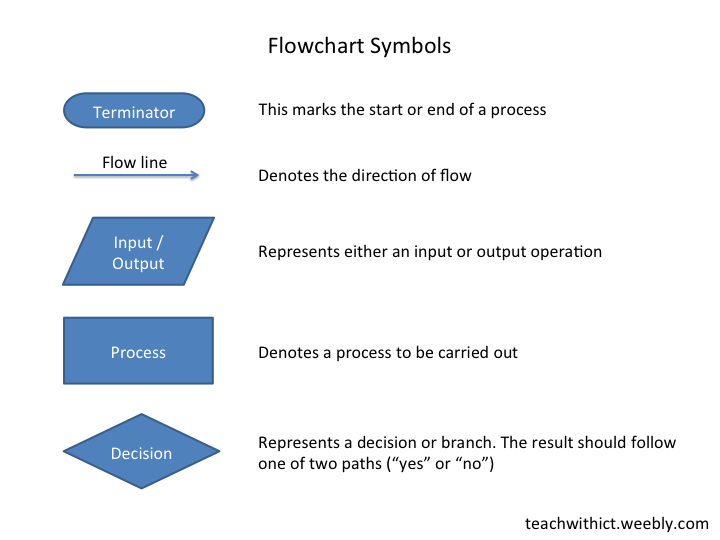
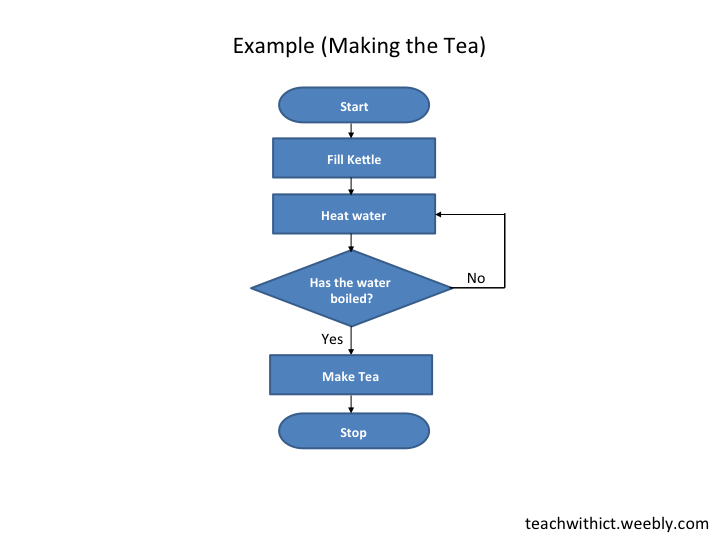
Lesson 1: Theory (Flowcharts) Suggested time: 50 mins Starter I started by showing students a clip from an episode of the Big Bang Theory in which Sheldon shows his friendship algorithm in the form of a flowchart. (Thanks to Phil Smith for suggesting this one via CAS) The Big Bang Theory - The friendship algorithm Introduction: I started by explaining that an algorithm is simply a sequence of steps for completing a task. I went on to explain that algorithms can be represented in many ways, the most commonly used being flow charts and pseudocode. I followed this by going through an example on the board (see below). Next, I displayed a set of the most commonly used flowchart symbols on the board and explained what they meant (see below). I then challenged the students to give examples of how each symbol might be used – giving prompts where necessary. Activity 1: (Interactive Challenge) I followed the introduction with two matching exercises which I downloaded from clickschool.co.uk - see below (requires flash). In the first matching exercise, students had to match the flowchart symbols to their names. In the second exercise, students were challenged to complete a given flowchart by placing the events in the correct order.
Activity 2: With input from the students, I went through the solution to the second matching exercise - “going to school”. I then asked the students to suggest what daily routines were missing from the example. Students were then placed into small groups and asked to improve the algorithm for getting up and going to school in the morning (in the form of a flowchart). Tip: You can get the students to write down any algorithm (e.g. making the tea, tying a shoelace, making a jam sandwich etc.) however, I find, the more complex the algorithm, the easier it is to explain the need for sub-routines later in the lesson. The going to school algorithm is great for demonstrating this as you can have several sub-routines for brushing your teeth, taking a shower, making breakfast etc. Also, try to encourage your students to make their algorithms as detailed as possible - this will also help with explaining the need for sub-routines later. Activity 3: Whilst the students were busy creating their flowcharts, I wandered around the classroom and picked out the group with most complex solution. I then invited that group to replicate their flowchart on the whiteboard and explain their solution to the rest of the class. As the group explained their solution, with the aid of the class, I corrected any errors and highlighted any misconceptions. I waited for the group to fill the whiteboard, at which point I stopped them and asked the rest of the class to suggest how the group could simplify / clean up their flowchart. This is where I introduced the flowchart symbol for sub-routines (see below). Activity 4: I asked the students to suggest the possible benefits of using sub-routines and waited for answers such as “easier to understand” and “several people can work on the same algorithm at the same time”. I finished by asking the students to modify their solutions to include at least one sub-routine. Resources: The friendship algorithm - Clip from an episode of the Big Bang Theory in which Sheldon shows his friendship algorithm in the form of a flowchart. BBC Byte Size (System Flowcharts) Algorithms in pseudocode and flow diagrams - Lesson plan on algorithms in pseudocode and flow diagrams. Algorithms in pseudocode and flow diagrams - This video, presented by Clive Beale of the Raspberry Pi Foundation, looks at good practice in the techniques of writing pseudocode and producing flow diagrams. Teach-ICT (Flowcharts) Alternative Activities: There are several ways in which you can introduce flowcharts. Here are some alternatives to the ones I suggested: 1. Jam Sandwich activity. In this exercise, students are asked to create an algorithm from set commands to program their teacher (sandwich bot) to make a jam sandwich. Students must write a set of working instructions, using commands such as Pick Up and Put Down, which their teacher has to follow precisely in order to make a jam sandwich. This task can be easily adapted to incorporate flowcharts and is great for introducing algorithms (at any age)! To find out more, check out this lesson plan, courtesy of Phil Bagge, CAS Primary Master Teacher (@baggiepr): Jam Sandwich Algorithm (programming teacher bot) 2. Making the tea starter. This is a starter activity I use to introduce algorithms. Print and cut out the attached instructions for making a cup of tea. Instruct students to put the instructions in the correct order. The “Making the Tea” exercise has been doing the rounds for sometime. I remember doing it at college back in the early 90’s. What I find interesting is seeing all the different variations for such as simple task. Extension task: If your students are feeling really confident, you could challenge them to create a BS 6008 compliant algorithm for making the tea!
3. More flowchart tasks. Here are a set of Flowchart tasks for simple activities (making tea, coffee, pizza, lasagna etc.) courtesy of David Barnard (via CAS). Includes a differentiated version of the making tea exercise. (Requires you to login to the CAS community - FREE) Tags: GCSE Computer Science, Algorithms, Pseudocode, Computing
What is Computational Thinking? So, what is Computational Thinking and what does it entail? Let’s start with what it’s not! Computational Thinking is not programming, nor is it thinking like a computer! For me, Computational Thinking is about solving problems. Miles Berry describes it best in his publication to Primary Schools on the topic of Computational Thinking: “computational thinking is about looking at problems or systems in a way that considers how computers could be used to help solve or model these.” What are the characteristics of Computational Thinking? There has been much debate about what Computational Thinking entails, however, the general consensus is that it includes, but is not limited to, the following characteristics: Decomposition: The process of breaking tasks down into smaller parts in order to explain a process more clearly. Pattern Recognition: The process of looking for patterns or common solutions to common problems and exploiting these to complete tasks in a more efficient and effective way. Abstraction: The process of filtering out information that is not necessary to solving the problem. Algorithm Design: The process of developing step-by-step instructions to solve a problem. Algorithm design often involves decomposition and pattern recognition to help solve a problem. Why teach Computational Thinking? Computational Thinking is central, not just to the teaching of Computer Science, but also to every day life! The key elements of Computational thinking lend themselves naturally to other STEM subjects such as Science and Maths but, as many would argue, are also an essential component of 21st Century learning. As Jeannette M. Wing, President’s Professor of Computer Science at Carnegie Mellon University, Pittsburgh succinctly puts it in her article published in Communications of the ACM: “Computational thinking is a fundamental skill for everyone, not just for computer scientists. To reading, writing and arithmetic, we should add computational thinking to every child’s analytical ability.” How can we teach Computational Thinking? Thankfully, there is a wealth of tools and resources to support the teaching of Computational Thinking. Below are just a few of my favourites: Strategies Strategies for supporting the teaching of Computational Thinking skills. Unplugged strategies Contrary to popular belief, you don’t need computers to teach Computational Thinking. In the immortal words of Edsger Dijkstra "Computer science is no more about computers than astronomy is about telescopes”. Probably the best example of this is the classic Jam Sandwich exercise. In this exercise, pupils are asked to create an algorithm from set commands to program their teacher (sandwich bot) to make a jam sandwich. Pupils must write a set of working instructions, using commands such as Pick Up and Put Down, which their teacher has to follow precisely in order to make a jam sandwich. Tip: If you're not a big fan of mess, I suggest replacing the jam with something less messy such as cheese or ham! To find out more, check out this lesson plan, courtesy of Phil Bagge, CAS Primary Master Teacher (@baggiepr): Jam Sandwich Algorithm (programming teacher bot) Other examples:
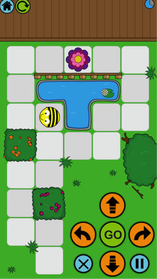
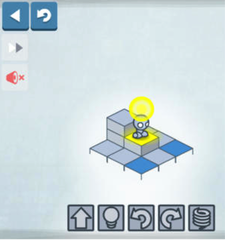
Game Based Learning & Games Design It is well documented how using games in a classroom context can facilitate collaborative learning, promote problem solving and stimulate an engaging learning environment. One methodology that demonstrates all these elements is Game Based Learning. What is Games Based Learning? Not to be confused with Gamification, Game Based Learning (GBL) is the process of using games to achieve a defined set of learning outcomes. Games that generate data e.g. Kinect Sports or Mario Kart, are ideal for teaching Maths and Statistics. Games that tell a story are great for developing creative writing. Puzzle games can develop problem solving and physics based games such as Angry Birds can be used to explain velocity and momentum. For example, you could play part of a game and ask students to describe what they saw and what they heard. You could ask students to write a story about what happens to the character next or to create a character of their own – complete with biography. You could have a race and record the lap times and use them to work out mean, mode and median or use a game to start a Socratic debate. One game that seems to optimise all these elements is Minecraft (See below). Using Minecraft to teach Computer Science theory. For those who don’t know Ray Chambers, Ray is a Head of Computing / ICT and Microsoft Innovative Expert Educator. Ray is also an evangelist Computer Science and has developed some innovative approaches to teaching Computing in the classroom. One example of this is teaching logic gates using Minecraft. In his series of lessons, Ray explores how to create AND / NOT and OR gates using Minecraft's creation mode. To find out more, visit his blog: https://raychambers.wordpress.com/2014/11/16/minecraft-vs-logic-gates/ Other games that support the teaching of computer science include: Light-bot - Lightbot is a free programming puzzle game. Simply guide the robot to light up tiles and solve levels using commands such as forward, rotate and jump. Lightbot is great for introducing concepts such as procedures, loops and conditionals. Light-bot 2 - Updated version of the popular Light-bot game. Running Cow - Use logic to guide the cows to the trophy. Dock the block - This game is a very basic version of cargo-bot (see below). The premise is simple, program the crane to dock the block on the barge using a set of simple commands e.g. Up, Down, Left, Right, Open and Close. (Requires Flash Player). Tank Gold Collector Game - It's not quite finished, though it demonstrates some important programming concepts. (Requires Flash Player). Blockly - Blockly is a web-based, graphical programming editor (with similarities to Scratch). Users can drag blocks together to build an application without any knowledge of coding. The lovely people who created blockly have also created a maze tutorial to introduce children to programming. Cisco Binary Game – The Cisco Binary Game is a great way to learn and practice the binary number system. It is also a lot of fun to play and very addictive! Game Design Game design, as the name suggests, is the process of planning the content and rules of a game. It also includes the design of gameplay, environment, storyline and even characters. A great way to engage students in a subject or topic is to get them to create a game to teach others that topic. Students don’t have to have any programming / coding skills to design the game however, game design does lend itself well to the teaching of computing / computer science. Thankfully, there is an abundance of online tools to support game design – not all of them requiring experience or knowledge of coding: TouchDevelop is an online app creation tool from Microsoft Research. Originally designed to develop Windows Phone 7 apps, TouchDevelop has recently been updated as a web app and now allows you to develop Windows Store apps suitable for Windows 8 touch screen devices. TouchDevelop is easy to use and works with several web browsers. Kodu is a new visual programming language made specifically for creating games. It is designed to be accessible for children and enjoyable for anyone. The visual nature of the language allows for rapid design iteration using only an Xbox game controller for input (mouse/keyboard input is also supported). Scratch is a project out of the MIT Media Lab. It allows users to program their own interactive stories and games with animated content. Scratch is specifically designed to make programming accessible for students (they recommend ages 8 and up). The website hosts support materials, user-created content and sample code to help you get started. The Media Lab has a license deal with LEGO to allow users to use LEGO characters in their Scratch projects. MissionMaker allows students to rapidly create visually 3D rich worlds for first-person 'Missions' - complete with sets, animated characters, dialogue and music. Stencyl is a free game creation platform that allows students to create 2D games for mobile devices and for the web. The software is also available in paid format. This gives you the ability to upload your finished games to the iTunes App Store. GameSalad allows members to design, publish and distribute original games without programming knowledge, and play with others across multiple platforms, such as the iPhone, iPad, Mac and any other Internet-connected device. Alice is a free and open source 3D programming environment designed to teach students object-oriented and event-driven programming. In Alice, students drag and drop graphic tiles in order to animate an object and create a program. Alice is great for creating an animation for telling a story, playing an interactive game, or a video to share on the web. Extensive support materials are provided. Quest allows you to create your very own 80's style text adventure games. Quest has a variety of uses in education, within a range of subjects and at a range of levels. Best of all, it's free. Perhaps the most obvious use of Quest is within ICT/Computing. Quest provides a gentle introduction to programming concepts – variables, functions, loops, expressions, objects, etc. – and the visual editor means that students don’t need to remember commands or syntax. Flipped Learning Even if you are lucky enough to have two hours or more a week to deliver your computing lessons, you may feel there is not enough time to cover everything. One of things I have started to do, to make best use of class time, is to flip my classroom. What is classroom flipping? If you are new to the idea of the flipped classroom, the concept is simple: the flipped classroom essentially reverses the traditional way of teaching i.e. what is usually done in the classroom, such as lectures, is done as homework and what is usually done as homework is done in the classroom. The benefit of this model, particularly for teaching Computer Science, is that the teacher can spend more time interacting with students. There are many ways to facilitate classroom flipping. In this post I explore some of these ways and look at tips for getting the most out your flipped classroom. 1. Video Tutorials Otherwise known as vodcasting, the most common way to flip your classroom, is to use teacher created videos which students can view outside of the classroom. There are several ways that you can share your videos with your students – probably the most popular being YouTube (www.youtube.com) however, you can also use other video sharing sites such as SchoolTube (http://www.schooltube.com), TeacherTube (http://www.teachertube.com), or if your school has one, your schools own VLE. The added bonus of using video sharing sites such as YouTube is that videos can be grouped into playlists and embedded into any web based tools such as the school's VLE, wiki, blog or website. You can also add useful videos from other contributors to build your playlists. Students can follow the lecture for homework and use lesson time to explore concepts in more detail. For examples of how you can use video tutorials to flip your computing classroom, visit Mark Clarkson's YouTube Channel: (http://www.youtube.com/user/mwclarkson) 2. Wikis A wiki allows groups of people to collaboratively develop websites with no prior knowledge or experience of website design. In the flipped classroom, a wiki can be used to host instructional videos and associated resources to introduce a concept or deliver a lesson. Students can then update the wiki and summarize what they have learned. Free tools such as PBWorks (http://pbworks.com/education) and Wikispaces (http://www.wikispaces.com) are ideal for creating classroom wikis. Wikispaces Classroom builds on the collaborative editing features of a wiki but includes some additional functionality to support the flipped classroom, features such as social interaction and formative assessment. Teachers can also monitor how often a student has read, edited or saved a page. To find out more about how to use wikis in your classroom, click here. 3. Social Media Tools Social media tools such as Edmodo and BlendSpace allow you to organise and share content such as videos, images, documents and text. The tools also allow you to create online lessons by embedding content from popular sites such as YouTube, Google, Vimeo, Flickr etc. Most tools also allow you to upload content from your computer, Dropbox or Google Drive. Tools such as Blendspace and Edmodo are ideal for flipping your classroom – students can research a topic at home and use lesson time more effectively. As a teacher you can monitor students progress and measure students understanding with the built-in quiz creation tools. You can even check to see if your students have actually viewed the resources you have shared with them. 4. Podcasting Podcasts are a wonderful way of allowing both teacher and students to share their work and experiences with a potential huge audience over the Internet. A podcast is like a radio show however, instead of being broadcast live, a podcast is pre-recorded and then distributed over the internet or to a mobile device allowing your students to listen to them when and where they please, even on the bus ride home. There are plenty of ways to share your podcast, probably one of the most famous being iTunes however, another tool worth considering is Audioboo. Audioboo is a free social-podcasting environment. With Audioboo, students and teachers can create podcasts (or boos) which can be shared with other social teaching tools such as edmodo. Probably the best example of using podcasts to support the teaching of Computer Science are those by Alan O’Donohoe: http://audioboo.fm/users/104685/boos 5. Learning to code online With online tools such as CodeAcademy (http://www.codecademy.com), LearningStreet (http://www.learnstreet.com), Grok Learning (https://groklearning.com/) and Khan Academy (http://www.khanacademy.org/cs), it has never been easier to learn how to code and now, thanks to such tools, it's never been easier to flip your computing classroom. Using the flipped classroom model, students can learn the basic syntax outside the classroom thus allowing the teacher to use classroom time for problem solving and supporting students with practical tasks. For more about the flipped learning model and how it can be used to support the teaching of Computer Science, click here: Make the most of your Computing lessons: flip your classroom. Resources Resources and tools to support the teaching of Computational Thinking Software / Tools  1. TouchDevelop TouchDevelop is an online app creation tool from Microsoft Research. Originally designed to develop Windows Phone 7 apps, TouchDevelop has recently been updated as a web app and now allows you to develop Windows Store apps suitable for Windows 8 touch screen devices. TouchDevelop is easy to use and works with several web browsers. A great starting point for using TouchDevelop is the Turtle library. The Turtle Library is great for introducing algorithm design. Students instruct the turtle by using simple instructions such as forward, right turn. Best of all, it's free and can be used on almost any web enabled device. To see an example of how you can use TouchDevelop to teach algorithm design, click here: TouchDevelop Challenge - Turtle Challenge  2. Scratch Scratch is a project out of the MIT Media Lab. It allows users to program their own interactive stories and games with animated content. Scratch is specifically designed to make programming accessible for students (they recommend ages 8 and up). The website hosts support materials, user-created content and sample code to help you get started. There is an abundance of free resources available online to support the use of Scratch in the classroom. A great place to start introducing algorithms in Scratch is the Scratch Dance tutorial.  3. Kodu Kodu is a visual programming language made specifically for creating games. It is designed to be accessible for children and enjoyable for anyone. The visual nature of the language makes it easy for younger children to start programming. Characters and events are controlled in Kodu using simple When and Do command making it easy for pupils to create sequences of instructions. Click here to access a set of Kodu challenges designed especially for a classroom setting. 4. App Inventor App Inventor is a great tool to teach programming to high school students. Like Scratch, App Inventor uses a drag-and-drop interface that allows you to assemble block commands and from these, build your app.  5. Minecraft What is Minecraft? Minecraft is a sandbox game where players have to build structures, fight monsters, hunt for food and gather resources in order to survive. Using Minecraft to teach coding. There are lots of ways to use Minecraft to teach coding and various plugins for the retail version of Minecraft such as Raspberry Juice which allow you to manipulate the Minecraft world using the Python programming language. There are also specific Minecraft Pi Edition - http://pi.minecraft.net/ Minecraft: Pi Edition is a version of Minecraft that’s designed to work on the Raspberry Pi - a cheap credit-card sized computer designed to help you to learn programming. The Pi edition has the added feature that you can program it using either Python or Java and is intended as an educational tool for novice programmers. It is available to download for free, from the official downloads page The Raspberry Pi foundation has created some fantastic tutorials to get you started: http://www.raspberrypi.org/learning/getting-started-with-minecraft-pi/ whilst Martin O’Hanlon and David Whale have teamed up to write a fantastic book called 'Adventures in Minecraft' - Adventures in Minecraft teaches young people to customise their Minecraft world with amazing structures and new gaming experiences, developing Python programming skills along the way. Minecraft Edu - http://minecraftedu.com/ According to the official website: "MinecraftEdu provides products and services that make it easy for educators to use Minecraft in the classroom. MinecraftEdu make a special version of Minecraft specifically for classroom use. It contains many additions to the original game that make it more useful and appropriate in a school setting." MinecraftEdu also offer a cloud-based solutions for schools for hosting Minecraft classroom servers so students and teachers can connect and play together securely. MinecraftEdu also hosts a library of lessons and activities that are available for free as well as a teacher community exploring uses of Minecraft in the classroom. Programming with Minecraft Edu ComputerCraftEdu provide a free plugin which is pre-installed with the MinecraftEdu setup which allows you to code in Minecraft. There are a variety of ways to create code: dragging and dropping, grid clicking, keyboard input and code editor (using the Lua programming language). ComputerCraftEdu also includes a handy turtle feature. Here is a handy guide for getting started with ComputerCraftEdu: http://services.minecraftedu.com/wiki/Programming_with_ComputerCraftEdu Using Minecraft to teach Computer Science theory. Minecraft can also be used to teach theory elements of the Computing programme of study. A great example of this is Ray Chambers lesson using Minecraft to teach logic gates using Red Stone (See Game Based Learning above). For more about using Minecraft in the classroom, click here: Using Minecraft in the education: A compilation of my favourite classroom projects. Apps
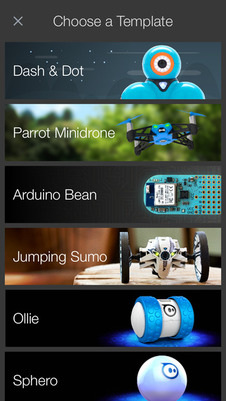
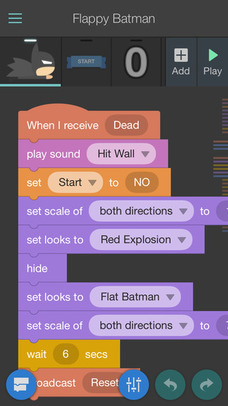
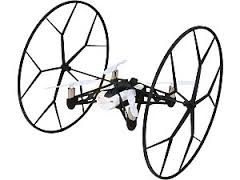
5. ScratchJr Inspired by the Scratch programming tool, ScratchJr is is an introductory programming language that enables young children (ages 5-7) to create their own interactive stories and games. Although based on the popular Scratch (drag-and-drop) block programming environment, the ScratchJr interface has been re-designed to make it more suitable for a younger audience. Publisher: MIT Media Lab Price: Free 6. Tickle App Tickle App is a free visual programming app for the iPad/iPhone. Using a ‘Scratch style’ interface, Tickle App introduces you to code through games creation and story-telling using its built-in animations and sound. With Tickle App (see Apps), you can also seamlessly connect to a number of physical devices such as Arduino, Dash & Dot, Sphero, Ollie, Parrot mini drones, Rolling Spider & Jumping Sumo, and Philips Hue smart lighting systems. Publisher: Tickle Labs, inc Price: Free Create games, stories and control a variety of physical devices with Tickle App. Gadgets / Tech 1. Parrot AR Drone What is an AR Drone? The Parrot AR Drone is a camera-equipped, smartphone and tablet controlled quadrocopter. (See video below) Thanks to work by Lucas Beyer, a 15 year old student from Barcelona, it is now possible to program the AR Drone with Python script using a piece of software called Autoflight: AutoFlight is a free download which features AR.Drone control with a gamepad or joystick, sensor data logging, 3d mapping, Python scripting to automate the drone's behavior and Arduino extensions. Price: AR Drone: Brand new, an AR Drone 2.0 is about £270 however, a second hand AR Drone 1.0 can be picked up from ebay for as little as £50. Both models can be controlled using the Autoflight software. Autoflight software: Free Download Autoflight here: http://www.lbpclabs.com/autoflight.html
2. Sphero & Ollie What is Sphero? Sphero is the world’s first robotic ball which you can control with your smartphone. (See video below) What is Ollie? Coming off the back of the huge success of Sphero, Ollie is the two-wheeled, Sphero inspired, app controlled ‘big brother’ to Sphero. With a larger processor and more powerful motor, Ollie is designed for speed and teaching the robot to perform tricks. http://www.sphero.com/ollie Sphero SPRK Sphero-SPRK is the latest edition to the Sphero family directly targeted for the education market. Sphero-SPRK comes with a dedicated app (SPRK app) straight out of the box designed to encourage students to code. The SPRK app lets you control the Sphero with visual blocks representing code – using their own C-based language called OVAL. Sphero also provide a series of lessons (http://www.sphero.com/education) to support the use of Sphero in the classroom designed around supporting a variety of STEM topics – including programming. http://www.sphero.com/sphero-sprk Controlling Sphero/Ollie/Parrot Rolling Spider with Tickle App As well as using the official Sphero apps to control Sphero and Ollie, you can also use free third party apps such as Tickle App (iOS). With Tickle App (see Apps section above), you can seamlessly connect to a number of physical devices such as Arduino, Dash & Dot, Sphero, Ollie, Parrot mini drones Rolling Spider & Jumping Sumo, and Philips Hue smart lighting systems and program them from your iPad using a ‘Scratch-like’ interface. (Note: Some devices require an iPad 3/iPad mini or above). Price: Sphero: £100. Sphero-SPRK: $129 (Currently only available in US - Educational discounts also available). Ollie: £80. Tickle App: Free  3. Dash & Dot Dot and Dash are educational toy robots that help kids learn to code through play. Designed to appeal to younger students, Dash & Dot can be programmed via a number of free apps including Blockly for Dash & Dot (iOS/Android) and Tickle App (iOS only). Both Dash and Dot are also compatible with Lego (including Lego MindStorm) which allow you to customise your robot e.g. add a pen holder to turn your robot into a Turtle etc. There are also a number of accessories available for both Dash & Dot including a phone holder and xylophone. Visit the official website to find out more: https://www.makewonder.com/robots/dashanddot Price: Dash: £150 Dash & Dot Pack: £190 Dash & Dot Wonder Pack (includes ): £240 Blockly for Dash & Dot App: Free Tickle App: Free
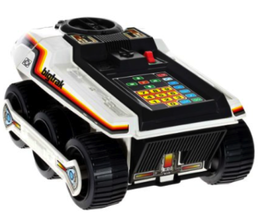
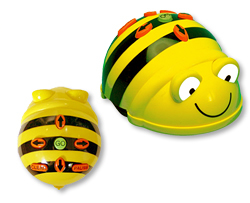
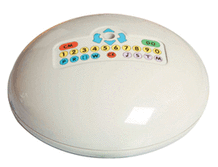
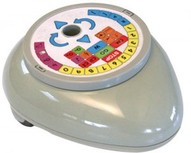
Note: Roamer has now been replaced by Roamer-Too. To find out more, click here: r-e-m.co.uk
Further reading: Interested in finding out more about Computational Thinking and how it can be applied in the classroom? Then check out the links below: PROGRAMMING IS THE START NOT THE END: LET’S DEVELOP COMPUTATIONAL THINKING AND PROBLEM SOLVING SKILLS - Article in which Dr. Tom Crick explores Computational Thinking. Computational Thinking: Searching to Speak – Paul Curzon explains Computational Thinking. Computational Thinking in Primary Schools - Miles Berry discusses Computational Thinking in Primary education. Disclaimer: All prices correct of date published. Teachwithict is not responsible for the content of external sites. Tags: Computational Thinking, Algorithm Design, Abstraction, Decomposition, Computer Science, Apps, Minecraft One of the things that I have enjoyed most about teaching Computer Science this year is teaching the theory element of the course. This has enabled me to experiment with a number of different strategies and try out some exciting new tools. Here are just some of my favourites: Strategies 1. Unplug your lessons Although the idea of teaching Computer Science without the use of computers may seem strange, I can honestly say that some of my best lessons have been those where I haven’t used any computers at all. A great example of this, and one that epitomises this approach, is the Binary Numbers activity courtesy of CS Unplugged. A video showing this approach in action can be found here: Unplugged: The show. Part 2: Binary counting Other examples:
2. DART your students Don’t worry, it’s not as bad as it sounds. For those new to DART (Directed Activity Related to Text), it is a strategy designed to support literacy. It focuses on the strategies of skimming, scanning and gap fill. The purpose of this DART activity is to give the students a brief overview of the main features of the CPU. Instructions:
A great example of the use of DART to support the teaching of computer science can be found here: CPU Dart Activity 3. Start a Socratic Debate Another approach I have used to teach computing theory with great success is Socratic debate. Socratic debates are great for covering controversial or thought provoking issues e.g. social, ethical and legal issues surrounding the use of computers. How it works: Students are initially split into teams to research a topic. After some initial research, the teams are then asked to compile their best arguments and choose a team leader (Spokesperson). Each team leader is then asked to come to the front and the teacher chooses one student to start the debate. Before the debate starts, the teacher gives each of the remaining students a piece of paper with a question or mission written on it (each aimed at different levels of ability) which they must complete during the debate e.g. "Who gave the most persuasive argument boys or girls and write down some examples" or "Who used quotes or acknowledged sources in their arguments and give examples". This way everyone is involved during the debate. At the end of the debate, students are chosen at random to reveal their question or mission to the rest of the class and to respond with their answer or observation. A great way to finish off a Socratic debate is to follow with a quick Pose, Pause, Pounce & Bounce activity. Example: Pose a question to the whole class e.g. Explain why a computer with a 4Ghz (6MB cache) processor would not be twice as fast as a 2Ghz (6MB cache) processor. Pause to give students time to digest the question and think of their answer. If the students are engaged, try holding the pause for a little while longer to build up the tension. Pounce: Quickly, select a student to answer the question. i.e. Insist the answer to the question comes from student A and possibly student B, directly and fast! Obviously, plan in your mind who you are going to direct the questions to before hand. Bounce the question or student's response on to another student (immediately after the pounce). e.g. Ask them if they agree with the students previous answer and to explain why. 4. Take your screwdrivers to work Possibly one of the most popular, and probably the most hands-on, topic in Computer Science theory is how do computers work! I find that this is a great excuse to grab some old computers and a set of screwdrivers and take the old computers apart. As the students take each computer apart, you can get them to label or photograph each component and write a brief description. These can then be used to create an interactive wall display (see using QR codes) or uploaded to a VLE / Wiki to form part of a revision resource (see flipping your classroom and creating Pecha Kuchas). If you are feeling really brave, you could challenge your students to put the computers back together and switch them on to see if they will boot up! To see an example of how this could work, check out this blog post: Teaching Computer Science: Day 1 - The day I took my screwdrivers to work. 5. Flip your classroom What is classroom flipping? If you are new to the idea of the flipped classroom, the concept is simple: the flipped classroom essentially reverses the traditional way of teaching i.e. what is usually done in the classroom, such as lectures, is done as homework and what is usually done as homework is done in the classroom. The benefit of this model, particularly for teaching Computer Science, is that the teacher can spend more time interacting with students. There are a number of tools and strategies to facilitate classroom flipping. Here are just a few of my favourites:
6. Create a Pecha Kucha I came across this little gem at a recent TeachMeet. The aim of Pecha Kucha is to encourage the presenter to be more concise and a little more creative with their presentations. Each presentation must contain no more than 20 slides and each slide must last for 20 seconds. It’s suggested that the presentation consist mainly of images, photos, or graphics with little to no text. The idea is that each image should advance the story and emphasize the key points. Pecha Kuchas are ideal for creating revision resources and can also be used to flip your classroom. To find out more about Pecha Kuchas, click here. 7. Use QR codes What are QR codes? A QR code (short for Quick Response Code) is a machine-readable code made up of black and white squares. QR codes are designed to enhance printed material such as: books, magazines, programmes and guides or even displays at museums and heritage sites. Using an array of free apps and online tools, you can quickly and easily create your very own multimedia-rich QR experiences which can be triggered from a web enabled device. Suggestions for using QR codes:
For more examples of how to use QR codes to teach computing theory, click on the links below: 8. Games Based Learning Game based learning (GBL) is the process of using games to achieve a defined set of learning outcomes. Games that generate data e.g. Kinect Sports and Mario Kart are great for teaching Maths and Statistics. Games that tell a story are great for developing creative writing. Puzzle games can develop problem solving and physics based games such as Angry Birds can be used to explain velocity and momentum. One game I have used to great affect in Computer Science is Top Trumps. An example of this can be seen here: Teaching Computer Science: Day 3 - Top Trumps (Storage Devices) 9. Gamify your lessons. Gamification is the process of introducing game-like elements into a traditionally non-gaming contexts to make them more fun and engaging. Gamification strategies include elements such as gamifying grading, incentivising students with rewards and adding competitive elements such as leaderboards. Zondle (Zondle.com) incorporates many of the game mechanics that embody gamification methodology, mechanics such as earning zollars (zondle dollars) and the use of leaderboards to keep students engaged. Zondle enables teachers and students to create games to support their learning. Teachers create and set topics on the zondle website for their students to play in games of their choosing. Students can also use the zondle to create their own topics to match exactly what they want to learn. To find out more, visit: Teaching Computer Science: Day 17 - Testing times! (Binary representation of data) 10. Design a game Game design, as the name suggests, is the process of planning the content and rules of a game. It also includes the design of gameplay, environment, storyline and even characters. A great way to engage students in a subject or topic is to get them to create a game to teach others that topic. Students don’t have to have any programming / coding skills to design the game however, game design does lend itself well to the teaching of computing / computer science, in particular Programming theory. Thankfully, there is an abundance of online tools to support game design – not all of them requiring experience or knowledge of coding:
Tools
1. Presentation tools
2. Collaborative tools
3. Text-to-Speech
4. Infographics
5. Quiz making tools
6. Classroom response tools
Tags: GCSE, Computer Science Related: GCSE Theory Resources Teaching Computer Science - Day 20: Sitting on the shelf. Over the last couple of lessons, I have been covering with my students the topic of Software. For this unit, students are expected to know about operating systems, utility programs and application software. In this final lesson on software, I explored custom written, off the shelf, open source and proprietary software. Learning Objectives:
Lesson 1: Theory (Types of Software) Suggested time: 50 mins Starter I started by showing students a video by Stephen Fry in which he talks about free software. Main: I explained to students that the software in the previous clip is referred to as open source software and that this is just one of several ways in which we can source software. I explained that some software, such as open source, is free and that some software can be changed to suit the users needs. I also explained that if a piece of software doesn’t already exist, we can pay to have it custom built specifically for our needs. I gave students a list of links (see below) and asked them to create some revision notes on the following different types of software:
I also explained that, in their notes, I wanted the students to compare custom built to off the shelf software and open source vs. proprietary software. Once students had compiled their notes, I asked them to attempt the following exam question: Q.1. Karen wants to use handheld computers to take customers’ orders in her restaurant. She is thinking of using custom written, open source software. 1. State what is meant by custom written software. (1 mark) 2. State two reasons why Karen may decide to use custom written software. (2 marks) 3. Discuss the implications of creating open source software for the restaurant. (6 marks) * * The quality of written communication will be assessed in your answer to this question. Answers:
Plenary: I displayed the sample exam question on the board and picked students at random to go through the possible answers. To ensure that everyone was engaged, I used the Pose, Pause, Pounce and Bounce questioning strategy: Example: Pose a question to the whole class e.g. Explain what is meant by custom written software. Pause to give students time to digest the question and think of their answer. If the students are engaged, try holding the pause for a little while longer to build up the tension. Pounce: Quickly, select a student to answer the question. i.e. Insist the answer to the question comes from student A and possibly student B, directly and fast! Obviously, plan in your mind who you are going to direct the questions to before hand. Bounce the question or student's response on to another student (immediately after the pounce). e.g. Ask them if they agree with the students previous answer and to explain why. For more information about the Pose, Pause, Pounce and Bounce technique, visit: @teachertoolkit - http://teachertoolkit.me/2013/01/04/pppb-version2/ Resources: Stephen Fry talks about free software - In this video, Stephen Fry talks about open source software What is Open Source? - This introductory video explains what open source software actually is, why it matters, and throws in a bit of history as well. Types of Software PowerPoint - Click on Software, followed by Lesson 3 – Types of Software Teach-ICT (Types of Software) Lesson 2: Test Suggested time: 50 mins Main: I issued each student with a test covering the topics in unit 2.1.3 (Software) of the OCR GCSE specification. The test is based on sample assessment material and past exam papers released by OCR. (Click on link below)
Plenary: I asked students to swap papers and went through the answers. I also explained to students the model answers using the marking criteria (See below)
In this week’s lesson, I continued the theme on software and introduced students to the next topic - Utility programs. Learning Objectives:
Lesson 1 & 2: Theory (Utility software) Suggested time: 100 mins This week, I decided to take on a different approach. Instead of the usual teacher led lesson, I thought I would encourage my students to de a bit of self-study. To facilitate this, I used the resources freely available on the Cambridge GCSE Computing website. Task 1: I directed the students to the Cambridge Computing website http://www.cambridgegcsecomputing.org/software-main#top and instructed them to watch the videos on the three different types of utility software and to complete the quiz at the end of each section. After completing all three sections, I asked students to make notes on each of the three types of utility software. Task 2: Once students had finished making their notes on each of the three types of utility software, I directed them to Moovly.com and asked them to watch the introductory video. If you haven’t use Moovly before, Moovly is a powerful web 2.0 tool for creating animated presentations. Moovly is free to use and enables you to create stunning animated videos that you can share online. After watching the introductory video, I instructed the students to create an animated presentation, for the class revision wiki, on the three types of utility software. I also explained that they would be presenting their Moovly to the rest of the class at the end of the lesson. (See example below) Plenary: Once everyone had finished and checked their Moovly presentations for errors etc., I asked each group to present one of their topics to the rest of the class. I used a random name selector (see blog post) to choose each group and topic at random so that we covered each topic at least once. Homework: I instructed students to upload their Moovly presentations to their revision wikis. Resources: Utility Software PowerPoint - http://www.pwnict.co.uk/computingGCSE/computingResources.html (Click on Software, followed by Lesson 2 – Utility Software) OCR - http://www.cambridgegcsecomputing.org/software-main#top Teach-ICT - http://www.teach-ict.com/gcse_computing/ocr/213_software/utilities/miniweb/index.htm Moovly User Guide - http://www.moovly.com/uploads/faq/moovly_user_guide.pdf 24/4/2014 GCSE Theory ResourcesYou have probably noticed that it has gone a little quiet of late on my Computing Blog. This is mainly due to the fact that my students are currently completing their first controlled assessment task and therefore there is not much to report. However, in the meantime, here is a collection of resources I have collated to help you teach the Computing theory element at GCSE level.
Programming Card trick - Simple card trick (Courtesy of Mark Dorling - Digital School House) to teach Algorithms. The purpose of the card trick is to teach pupils about sequencing and modelling a sequence of instructions. Teach-ICT (Algorithms) - Resources to support the teaching of Programming theory at GCSE level. Cambridge GCSE Computing (Programming) - This topic will test the learners' understanding of fundamental programming concepts which are common to most imperative languages. Computing Hardware General How computers work - Activity, courtesy of CS Unplugged, which provides students a basic understanding of how computers work by having them act out a simple computer simulation. Your PC, inside and out: Part 1 - (Free download courtesy of makeuseof.com) In this guide Lachlan Roy breaks the computer down into its different components. For each component he describes its function, talks about best brands on the market, explains the different specifications to look out for and provides a bit of history, too. Part 1 focusses on the motherboard. Your PC, inside and out: Part 2 - (Free download courtesy of makeuseof.com) Part 2 highlights everything you need to know about CPUs, storage devices, memory, graphics cards and other computer components. Memory How many bytes in a Megabyte - Why is one kilobyte equal to 1024 bytes and not 1000 bytes? This article explains why. How stuff works - Computer memory - How stuff works article on how memory works (also contains several related articles and quizzes) The difference between RAM and ROM – Part A (Cambridge GCSE Computing Online) The difference between RAM and ROM – Part B (Cambridge GCSE Computing Online) GCSE Computing.net – Memory Teach-ICT – Memory PWN ICT (Click on Hardware and then Memory) Storage devices Storage devices top trumps - Lesson on storage devices using the classic game - top trumps. RI Christmas Lecture 2008, Lecture 3: The Ghost in the machine, part 2 - Explanation of how a hard disk works – Fast forward to 12 min 30 sec. How a CD works - Video explaining how a optical devices work. How a hard disk works - Animation showing how a hard disk works. CPU Fetch Execute Cycle - Animation explaining the Fetch Execute Cycle. CPU DART Activity - For those new to DART (Directed Activity related to Text), this activity is designed to support literacy. It focuses on the strategies of skimming, scanning and gap fill. The purpose of this DART activity is to give the students a brief overview of the main features of the CPU. Mr. Clarkson talks about… The CPU - Video from a Computing at School Master Teacher explaining all about the CPU. Teach-ICT – CPU PWN ICT (Click on Hardware and then CPU) Binary Logic All very logical - Interactive activity on logic gates courtesy of the Royal Institute. Logic gates using toys - Youtube video demonstrating how you can use every day items such as dominoes and marbles to teach logic gates. Representing Data Units of Data Units of Data Measurement (60 second Mind Meld) - Bit, Nibble, Byte, Kilobyte etc . . . all explained in face-paced 60 second tutorial. Teach-ICT - Representing Data OCR - Representation of data in computer systems Definitions of units - Cambridge GCSE Computing Online. Binary to Denary Counting the dots - A fun and engaging activity from CS Unplugged on Binary numbers. (Supporting video) Binary Addition and Subtraction 1 + 1 = 10 - Lesson on Binary Addition and Subtraction CISCO Binary Game Binary Calculator Binary Arithmetic Task Hexadecimal It's all about Hex! - Lesson on Hexadecimal. Includes Hex to Binary and Hex to Denary conversion. Hexadecimal to Decimal - Video explaining how to change Hexadecimal to Decimal numbers. Binary representation of Images It's a Cracker! - Festive themed lesson explaining how a computer stores images. Colour by Numbers - This activity, courtesy of CS Unplugged, explores how images are displayed based on the pixel as a building block. Binary representation of Characters Representation of text - Explanation of how characters are represented in a computer system. Ascii text to Binary converter Ascii Binary conversion chart Text to Ascii and Binary converter Binary representation of Sound Everything is Sound! - Lesson on how sound is represented and stored on a computer system. Sound in Binary – Set of resources explaining how sound is stored on a computer including sample audio tracks compressed at different sampling rates. (Click on 2.1.4 representation of data --> Lesson 5 Sound in Binary) Classzone – Frequency / Amplitude simulator Binary representation of sound worksheet – Excellent worksheet courtesy of Emma Partridge (via CAS). Extract from the CHRISTMAS LECTURES 2008: Chris Bishop - The Ghost in the Machine showing how sound is stored on a computer (Skip to 13:40). Binary representation of Instructions Following Instructions! - Lesson on how binary can be used to store instructions. Teach-ICT (Binary representation of Instructions) - Resources to support the teaching of Binary Representation theory at GCSE level. Software Operating Systems All systems operating - Lesson on Operating Systems. Operating Systems – Introductory video on Operating Systems. PWNICT: Operating Systems – PowerPoint explaining the purpose of the Operating System. (Click on Software, followed by Lesson 1 - OS) BBC Bytesize (Operating Systems) Teach-ICT (Operating Systems) Utility Software Cambridge GCSE Computing (Software) - This group of videos, presented by Julie Hodgson, looks at the purpose and use of common utility programs Teach-ICT (Utility Software) Types of Software Stephen Fry talks about free software - Video in which Stephen Fry talks about open source software. Teach-ICT (Types of Software) Computer Communications and Networking Network Simulator - This great online flash based simulator allows students to create their own network without having to tear-apart your schools network! Teach-ICT (Networks) - Resources to support the teaching of Network theory at GCSE level. Database Theory Teach-ICT (Database Concepts) - Resources to support the teaching of Database theory at GCSE level. Cambridge GCSE Computing (Databases) - Resources to support the teaching of the Database theory element of the OCR GCSE Computing specification. General Books GCSE Computing - This excellent textbooks by Susan Robson are endorsed by OCR & AQA and cover the full specification for both GCSE Computing theory unit. OCR Computing for GCSE - Written by examiners and experienced teachers, this book covers the theory unit swell as the two controlled assessment units for OCR specification. Useful Websites Teach-ICT (Computing) - Resources to support the teaching of Computing theory at GCSE level. GCSEComputing.net - Set of excellent teacher notes to support the delivery of both the OCR and AQA theory elements. Computing At School (CAS) Online - Online community dedicated to teaching Programming / Computer Science in school. Contains a wealth of resources including Schemes of Work, Tutorials and discussions on best practice. Computer Science Unplugged - CS Unplugged is a collection of free learning activities that teach Computer Science through engaging games and puzzles that use cards, string, crayons and lots of running around. Below is a series of tutorials I have created for TouchDevelop to support the UK hour of code. These easy to use step-by-step tutorials are designed to introduce students and teachers to coding and range from beginner (no programming experience) to advanced. What is TouchDevelop? TouchDevelop is an online app creation tool from Microsoft Research. Originally designed to develop Windows Phone 7 apps, the TouchDevelop Web App now allows you to develop Windows Store apps suitable for Windows 8 touch screen devices and runs on iPad, iPhone, Android, PC, Mac, Linux. There is also a dedicated TouchDevelop app on the Windows Phone 8. Tutorials KS2 TouchDevelop Turtle Tutorial
Alternatively, you could also try the official TouchDevelop turtle tutorial: touchdevelop.com/app/beta#hub:new:turtle KS3 / KS4 Beginner Intermediate Advanced Hungry for more?
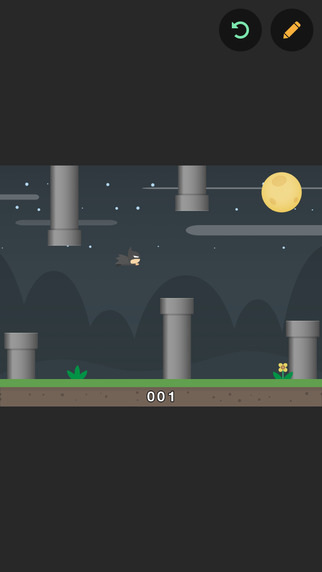
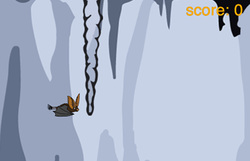
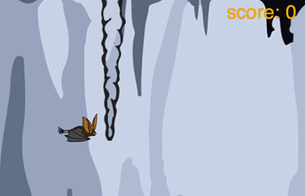
If these tutorials have wet your appetite and you want to learn more! Why not sign up for UK hour of code (running between the 3rd and 9th March 2014). Through fun tutorials and lesson plans, Hour of code plans to be the biggest ever national initiative to get students, teachers and parents learning to code in just sixty minutes. Hour of Code has already been extremely successful in the United States with more than 15 million participants. Register for the UK hour of code here: http://uk.code.org  With flappy bird removed from online stores, you may be all in a flap over where you are going to get your next flappy related fix. Well worry no more because, thanks to a free online tool called touchdevelop, you can now create your very own flapptastic app by simply following a few easy steps. What is touchdevelop? touchdevelop is an online app creation tool from Microsoft Research. Originally designed to develop Windows Phone 7 apps, the touchdevelop Web App now allows you to develop Windows Store apps suitable for Windows 8 touch screen devices and runs on iPad, iPhone, Android, PC, Mac, Linux. There is also a dedicated touchdevelop app on the Windows Phone 8. Tutorial Created for the UK hour of code, this easy to use step-by-step tutorial will teach you how to create your very own flappy bird clone. Just follow this step-by-step tutorial and your flappy bird woes will soon be over. Click here: https://www.touchdevelop.com/nczy All in a flap - Create your very own flappy bird clone with this step-by-step tutorial. Hungry for more? If this tutorial has wet your appetite and you want to learn more! Why not sign up for UK hour of code (running between the 3rd and 9th March 2014). Through fun tutorials and lesson plans, Hour of code plans to be the biggest ever national initiative to get students, teachers and parents learning to code in just sixty minutes. Hour of Code has already been extremely successful in the United States with more than 15 million participants. Register for the UK hour of code here: http://uk.code.org Where next? Like to find out more about touchdevelop or want to try out some more tutorials? Below is a list of courses and schemes of work that introduce you to the programming concepts and the environment of the touchdevelop Web App. touchdevelop hour of code – official tutorials from the touchdevelop team Build your first app - free online course from Microsoft touchdevelop challenge hour of code – step-by-step tutorials created to support the UK hour of code touchdevelop Challenge - series of lessons and challenges to get students building games and apps with touchdevelop. games4learning - Created by David Renton (Extended Lecturer in Games Development: Reid Kerr College, Scotland) A series of YouTube tutorials which introduce students to game design using touchdevelop. Ray Chambers' touchdevelop Scheme of Work - A complete scheme of work for touchdevelop which sees students design and create an app from scratch.  In this week’s lesson, I introduced students to the next topic – Software. For this unit, students are expected to know about operating systems, utility programs and application software. In this first lesson, I explored operating systems. Learning Objectives:
Lesson 1 & 2: Theory (Operating systems) Suggested time: 100 mins Starter Before the lesson, I pre-prepared 6 devices: 1 PC (with Windows 7 installed), 1 PC with command prompt loaded, 1 iPad (with iOS 7 installed), 1 iMac (with OSX Mountain Lion installed), 1 Raspberry Pi (with Debian installed) and 1 PC with Blackberry Emulator loaded (Download here) - I downloaded the Blackberry Curve 9380 simulator. At the start of the lesson, I spread the devices around the classroom and, as the students arrived, directed them to one of the workstations. Once all the students had been allocated a workstation, I instructed the students to try out the Operating Systems in front of them and make notes on ease of use, speed etc. (Note: for command prompt users, I issued a set of simple instructions e.g. cd, dir, edit etc.) I also asked them to try some simple tasks such as open a text file, copy and paste a file, draw a picture using a painting package etc. After 3 minutes, I asked each group to move to the next workstation and try a different workstation. I repeated this process until each group had experienced all the different operating systems. Interesting note: All the students seemed to love playing with the command prompt. Next, I asked the students to explain the similarity and differences of the different Operating Systems they had been exploring – I encouraged them to explain the differences with the user interface and then explained that we call these interfaces the Graphical User Interface (GUI) and that this is one of the things controlled by the Operating System. Alternatively, if you don’t have time or don’t have access to a number of different Operating Systems, instruct students to research different operating systems on the Internet and make notes about each. I have included some links below: OSX - http://www.youtube.com/watch?v=hon6FqY5ZQ4 Windows 7 - http://www.youtube.com/watch?v=2LWljyZEaAM Linux - http://www.youtube.com/watch?v=I8ik8pDTgJE Main: I displayed some icons on the board for some popular operating systems. I then invited the students to try to name them all. I then explained that these are all examples of Operating Systems. I then explained that the Operating System, also known as system software, is responsible for managing:
Next, I split the class in to mixed ability groups (Depending on your class size, I recommend either 5 or 10 groups). I then informed the students that they would be taking on the roll of the teacher for the lesson. (I based this on an idea suggested by Ryan Lowe via Computing At School. You can download the original activity here: http://community.computingatschool.org.uk/resources/1418) I then gave each group a topic at random using a random name selector (see classroom management tools). Alternatively, you could place the 5 topics in envelopes and ask someone from each group to pick an envelope at random. Finally, I instructed the students to create a POWToon (www.powtoon.com) based on their topic and explained that they would be presenting their POWtoons to the rest of the class at the end of the lesson. (see example below) Plenary: Once everyone had finished and checked their POWtoon for errors etc., I asked each group to present one of their topics to the rest of the class. I used the random name selector again to choose each group and topic at random so that we covered each topic at least once. See example below: As Ryan suggests in his post, the success to this task was providing a list of key questions to help the students think and reflect when researching and putting the information together. As Ryan also suggests, rewards such as chocolates for the best group also help! Resources:
Operating Systems – Introduction: http://www.youtube.com/watch?v=5AjReRMoG3Y OS PowerPoint – http://www.pwnict.co.uk/computingGCSE/computingResources.html (Click on Software, followed by Lesson 1 - OS) BBC Bytesize - http://www.bbc.co.uk/schools/gcsebitesize/ict/software/4operatingsystemsrev1.shtml Teach-ICT - http://www.teach-ict.com/gcse_computing/ocr/213_software/operating_system_functions/miniweb/pg2.htm  Concluding the theme of how data is stored in computers, in this week’s lesson, I got students to create their own revision games for unit 2.1.4 using Zondle. Also, as a little treat, I decided to issue my students with my own test on section 2.1.4 of the GCSE OCR spec. – Binary representation of data. Lesson 1: Revision Suggested time: 50 mins Starter I started by giving students a quick test that I created using Zondle: Main: I informed students that they will be creating revision games using a free online creation tool called Zondle. I demonstrated on the board how to create a game with Zondle and how to add questions. As I demonstrated how to add questions to the game, I asked students to suggest possible questions. Finally, I gave students their usernames and password to login to Zondle and instructed them to create a series of revision games based on unit 2.1.4. I told students that they could use my example (from the start of the lesson) to help them get started. Plenary: Students attempted each other’s revision games. Lesson 2: Test Suggested time: 50 mins Main: I issued each student with a test I created covering the topics in unit 2.1.4 (Binary representation of data) of the OCR GCSE specification. The test is based on sample assessment material and past exam papers released by OCR. (Click on link below)
Plenary: I asked students to swap papers and went through the answers. I also explained to students the model answers using the marking criteria (See below)
|
AuthorSimon Johnson Microsoft Innovative Educator Expert / MIE Trainer
Minecraft Cert. Educator / Global Mentor
CAS Master Teacher
Raspberry Pi Cert. Educator
Tickle Ambassador
Archives
June 2017
CategoriesAll Algorithms Cpu Fundamentals Hardware Input & Output Memory OCR A451 Software Storage |
|||||||||||||||||||||||||||||||||||||||||||||||||||||||||||||||||||||||||||||||
Search by typing & pressing enter










 RSS Feed
