|
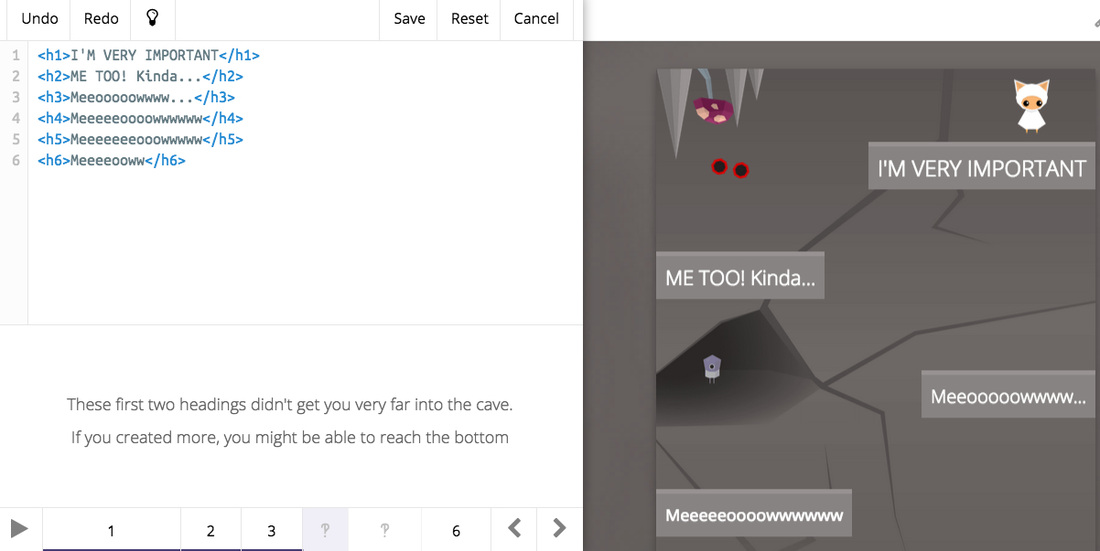
EraseAllKittens is a promising new website which claims to teach kids HTML in a new and unique way - using animated kittens!!! According to the official website "E.A.K. (Erase All Kittens) is an online platform game, made by Drum Roll, that teaches kids to code and create on the web. It does this in a unique way - by encouraging them to hack into levels, written in HTML and CSS (the languages of websites) - in order to complete the game." Whilst at first the concept seems a little bizarre, it actually works extremely well! The idea is that students create platforms / pathways to guide their character 'Arca' to safety using a combination of HTML & CSS. The whole concept exemplifies the Gamification model (The process of introducing game-like elements into a traditionally non-gaming contexts to make them more fun and engaging) with students being rewarded with animated gifs for successfully completing each challenge. There is also a dose of humour along the way via audio commentary and introductory videos (As the website suggests, I recommend that the students wear headphones whilst completing the challenges!) Students use HTML & CSS tags to help guide Arca to safety (rescuing the odd kitten along the way) At the moment, the project is just a demo and only covers paragraph, header and div tags, with a little introduction to CSS as a reward for completing the survey at the end! However, whilst currently only in beta, the concept shows great potential and I look forward to updates in the future.
0 Comments
Anyone who has taught Computing / Computer Science will know that the 'coding and programming' strand can sometimes feel like a very dry topic, especially for young children. One way to inject some fun into your coding lessons is to gamily them! For those new to the concept, gamification is the process of introducing game-like elements into a traditionally non-gaming contexts to make them more fun and engaging. Gamification strategies include elements such as gamifying grading, incentivizing students with rewards and adding competitive elements such as leaderboards. One strategy that exemplifies the concept of gamification in the teaching of coding is a game called 'Code Golf'. What is 'Code Golf'? I came across the idea of Code Golf at a Computing At School (CAS) conference last summer and have been experimenting with it ever since. The idea is simple, participants are given a problem (or working solution) and are challenged to solve it using the fewest lines of code. The term Code Golf is derived from the similarity of its scoring system to that of conventional golf, where participants aim to achieve the lowest score possible. Why Code Golf? The idea behind Code Golf is to encourage efficient use of code. At GCSE / A-Level, students are required to make efficient use of code in order to access higher grades / mark bands. Efficient code also uses less RAM, compiles quicker and uses up less storage space. Students can use a combination of features such as loops (For, While, Repeat) or sub-routines to achieve their optimised code however, readability and usability must not be sacrificed at the expense of code optimisation therefore, white space and comments do not count as lines; we still want to encourage students to break up and comment their code so that it is comprehensible to others, easier to debug and easy for others to re-use. Types of Code Golf There are two main ways to play Code Golf. The first way requires students to solve a given problem using the fewest lines of code. The second method, which requires a little more preparation from the teacher, requires the students to optimise a given working solution. In both methods, the challenge is for the students to create a solution using the least amount of code. To add a little extra challenge, the teacher can add a Par value (or target number), with the Par being the optimal number of lines of code. This Par value can be altered for different levels of ability (similar to the 'handicap' system in conventional golf) thus allowing the teacher to differentiate the lesson. Example: The following is an example of a simple 'Par Challenge'. In this example, students are challenged to create a square using the Python turtle library using 6 lines of code (Par 6). Working, but inefficient, solution for creating a square in Python using 11 lines of code. More efficient solution for creating a square using 6 lines of code (or Par 6). Useful Links:
14/1/2015 Inject some magic into your Computing lessons: Introducing algorithms through Magic TricksKeywords: Algorithm; Decomposition Background What is Computational Thinking? So, what is Computational Thinking and what does it entail? Let’s start with what it’s not! Computational Thinking is not programming, nor is it thinking like a computer! For me, Computational Thinking is about solving problems. Miles Berry describes it best in his publication to Primary Schools on the topic of Computational Thinking: “computational thinking is about looking at problems or systems in a way that considers how computers could be used to help solve or model these.” What are the characteristics of Computational Thinking? There has been much debate about what Computational Thinking entails, however, the general consensus is that it includes, but is not limited to, the following characteristics:
Why teach Computational Thinking? Computational Thinking is central, not just to the teaching of Computer Science, but also to every day life! The key elements of Computational thinking lend themselves naturally to other STEM subjects such as Science and Maths but, as many would argue, are also an essential component of 21st Century learning. As Jeannette M. Wing, President’s Professor of Computer Science at Carnegie Mellon University, Pittsburgh succinctly puts it in her article published in Communications of the ACM: “Computational thinking is a fundamental skill for everyone, not just for computer scientists. To reading, writing and arithmetic, we should add computational thinking to every child’s analytical ability.” - See more at: http://teachwithict.weebly.com/computing-blog/strategies-and-resources-to-support-the-teaching-of-computational-thinking Using magic tricks to teach computational thinking? You may be asking the question: “What do magic tricks have to do with computational thinking?”. The simplest answer is that all magic tricks are based on an algorithm (sequence of step-by-step instructions.) Similar to a recipe or set of directions, if any of the steps are wrong or are not clearly explained, the trick is likely to fail. In this lesson, students will be taught a simple magic trick (Courtesy of Mark Dorling). Using the magic trick students will explore some of the main principles of Computational Thinking. Lesson Starter Start the lesson by demonstrating a simple card trick - courtesy of Mark Dorling (Digital School House). The purpose of card trick is to teach pupils about sequencing and modelling a sequence of instructions. See video below: I suggest following the video exactly, including the Harry Potter story! The reason I suggest using the story is that I find students remember the trick better if they can link it to the story. At the end of the trick, divide the students into small teams and give each team a set of cards. Next, challenge the students to repeat the trick and, once they have solved the trick, produce step-by-step instructions. (Note: Try to encourage the students to write down every step – this is key for the next part). Tip: For those students who find this task difficult, you can let them watch the video again. I also find that doing the trick with all the cards faced up also helps. As the teams write their step-by-step instructions, circle around the class and attempt to follow their instructions: the key here is to follow the instructions exactly – emphasising any imprecise/vague instructions (as if you were a robot). For example, if a student writes down the instruction “Sort the cards into four suits”, do this for every card in the pack - not just the cards 7, 8, 9 and 10, or if a student writes down the instruction “Put the cards in order”, sort some of the cards in descending order 10, 9, 8, 7 and some in ascending order 7, 8, 9, 10. The purpose of this is will become clearer later. After about 10 minutes, or once the majority of students have completed their step-by-step instructions (whichever comes sooner), stop the class and ask if any of the teams think they have a fully working / close to working set of instructions – if no one volunteers, choose a team you know has completed the task. Next, in front of the whole class, follow the step-by-step instructions from the volunteer group (or group you chose if no volunteers). Important! When following the students’ instructions, make sure that you, again, emphasise any imprecise/vague instructions. Hopefully this will generate discussion about need for detailed / precise instructions. Draw out answers such as “The instructions were too vague” or “The instructions were not specific”. Explain to students that computers (such as robots) can’t think for themselves therefore, when programming a computer, they must make sure that their instructions are clear / concise.
Task 1: Making the Tea Explain to students that they are going to write an algorithm for making a cup of tea.
Instruct students to put the instructions in the correct order. Explain to the class that not there is no one right answer and that everyone’s solution will be slightly different. Once the students have agreed on the correct order for making their cup of tea, ask them if they can decompose each of the instructions into smaller parts e.g. getting the milk from the fridge – opening and closing the fridge door etc. As an extra challenge, you could challenge the students to see who can break down their steps into the smallest parts.
Once the majority of students have finished, stop the class and ask them “What is wrong with the making the tea task?” Prompt the students to think about the problems that occurred in the previous exercise (Magic trick). Draw out answers such as: “Missing instructions e.g. to fill the kettle with water”, “Need to add instructions for taking things from the cupboard” etc. Explain to students that we can break down some of instructions, such as filling the kettle, into smaller parts and that we call this “Decomposition”. Explain to students that “Decomposition” is the first step of computational thinking. By decomposing something, we get a greater understanding of the problem.
Main activity 2: Writing an algorithm, Introduce students to algorithms. Explain that once a problem has been decomposed, the next step is to write a series of step-by-step instructions to solve the problem (otherwise known as an algorithm) Explain that we can use algorithms to describe everyday routines / activities such as a recipe for making a pizza or set of directions for finding our way home. Challenge students to write an algorithm (sequence of step-by-step instructions) for a daily routine e.g. getting up in the morning, cleaning teeth, making a sandwich, walking to school, feeding the dog etc. Encourage students to be clear and concise when writing their instructions and not to miss any steps out – no matter how obvious they may appear! Plenary Write the following keywords on the board:
Ask the students to explain the meaning of the two keywords. The Pose, Pause, Pounce and Bounce strategy is perfect for this kind of activity. Example: Pose a question to the whole class e.g. What is meant by the word Algorithm? Pause to give students time to digest the question and think of their answer. If the students are engaged, try holding the pause for a little while longer to build up the tension. Pounce: Quickly, select a student to answer the question. i.e. Insist the answer to the question comes from student A and possibly student B, directly and fast! Obviously, plan in your mind who you are going to direct the questions to before hand. Bounce the question or student's response on to another student (immediately after the pounce). e.g. Ask them if they agree with the students previous answer or to give an example. For more information about the Pose, Pause, Pounce and Bounce technique, visit: @teachertoolkit - http://teachertoolkit.me/2013/01/04/pppb-version2/ Homework Students to finish off their algorithm or write a new algorithm for different daily routine. Next steps:
Alternative activities Alternatives to starter activity
Alternatives to making the Tea Activity More Flow Chart activities
Useful Links:
Tags: Computational thinking, magic tricks, algorithms, decomposition You may also be interested in: Strategies and resources to support the teaching of Computational Thinking Computing At School has produced a new resource to help primary and secondary teachers in England get to grips with the new computing curriculum which was introduced in September. Funded by Microsoft and the Department for Education QuickStart Computing is a comprehensive, national programme designed to help primary and secondary teachers to plan, teach and assess this brand new subject.
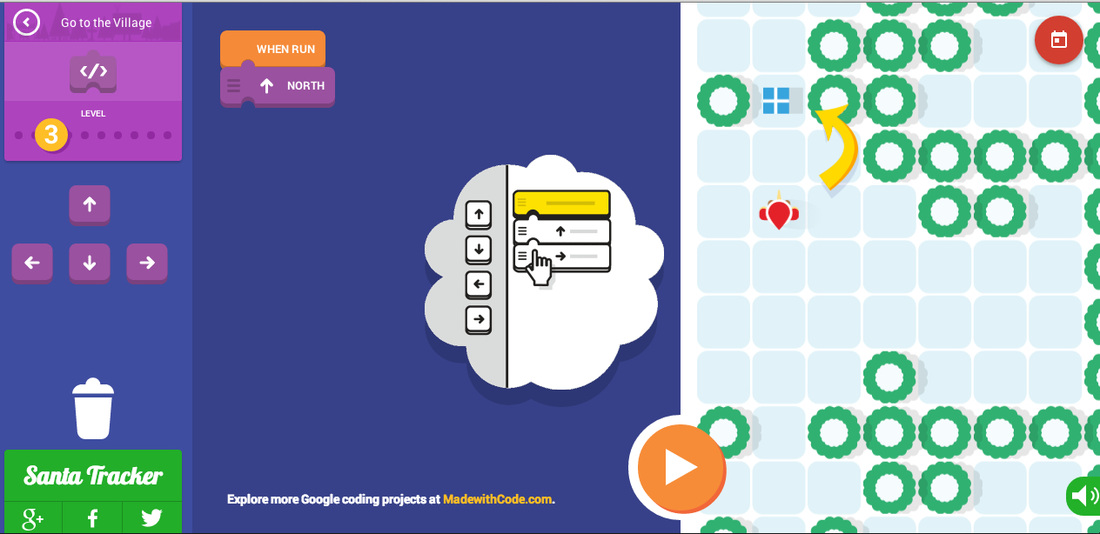
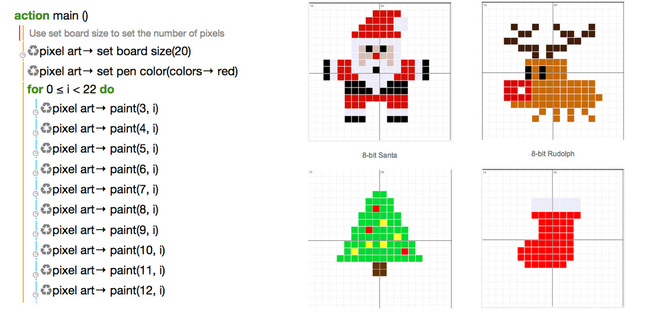
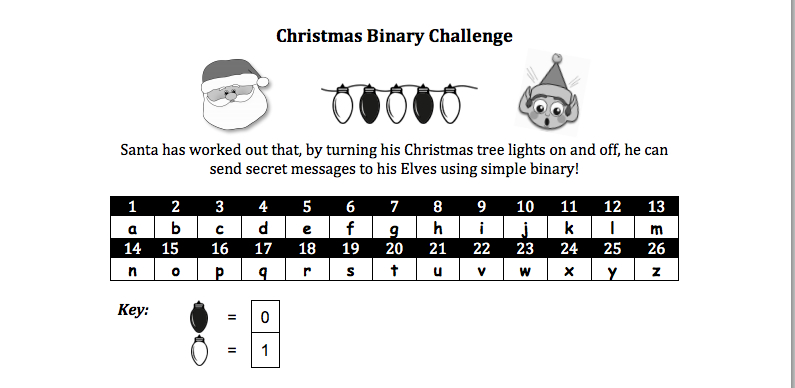
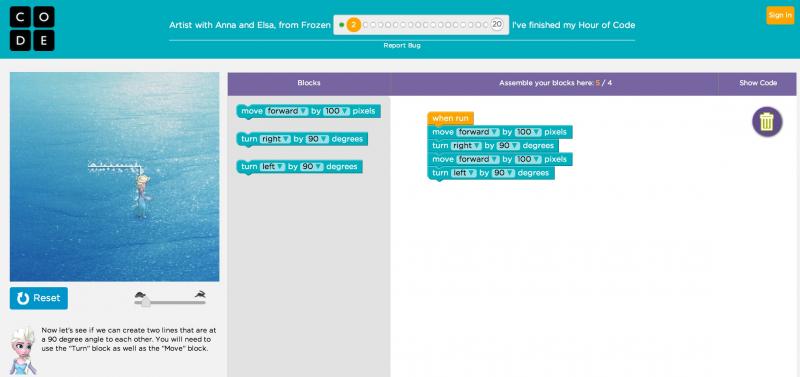
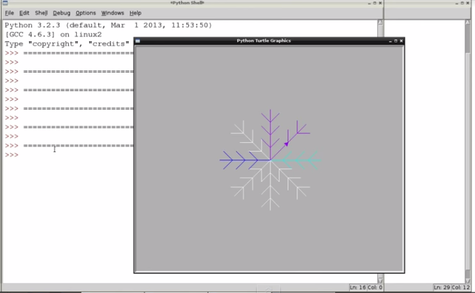
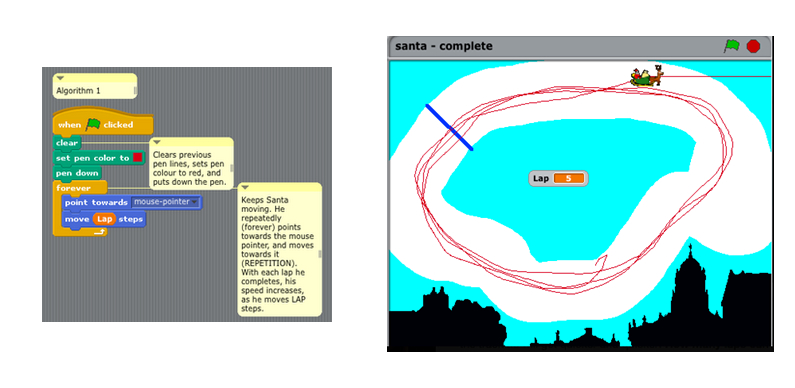
QuickStart Computing is a free CPD toolkit designed to help teachers to develop and run successful CPD in their school or cluster. All primary and secondary schools have access to QuickStart Computing online and 40,000 free hard copies are being distributed through Computing At School. The QuickStart website includes downloadable versions of the full teachers handbook, and lots of additional resources including links to useful sites, online videos and interactive tools. For more information visit: www.quickstartcomputing.org 15/12/2014 Festive Hour of Code ActivitiesIf, like me, you like to keep your students challenged up until the very last day of term, here are some festive coding / computing related resources to keep your students occupied! Google Santa Tracker Guide Santa back to the village with this Build Your Own Blocks style coding activity courtesy of Google: https://santatracker.google.com/?hl=en#codelab TouchDevelop 8-bit Festive Challenge Create festive 8-bit artwork using Microsoft TouchDevelop: http://touchdevelop.weebly.com/hour-of-code.html Festive Binary Challenge In this festive themed lesson, students will learn about how data is stored in computers and also how to convert binary to denary (and vice-versa): http://teachwithict.weebly.com/binary-representation.html Code with Anna & Elsa (Frozen) Learn how to code by creating snowflakes and helping Disney's Elsa and Ana to ice skate around the computer screen: https://learn.code.org/s/frozen Python Snowflakes Learn how to create snowflakes using the turtle function in Python: https://www.youtube.com/watch?v=DHmeX7YTHBY Scratch Santa Game Create a Santa game for Christmas using Scratch: http://www.lttonline.net/blog/2013/12/7/creating-a-christmas-game-using-scratch Have I missed anything?
Please let me know if I have missed anything and I will add it to the list! Hour of Code
The official Hour of Code website - http://hourofcode.com/us/resources - has lots of resources to introduce hour of code week such as videos, posters and hand outs. Code.org Code.org - http://code.org/ - Has lots of tutorials for hour of code including creating a winter wonderland with Anna & Elsa from Frozen. TouchDevelop TouchDevelop - https://www.touchdevelop.com/hourofcode2 - Has a selection of step-by-step tutorials for hour of code to teach students how to create their own Windows Store apps including a version of Flappy Bird. TouchDevelop.weebly.com More hour of code tutorials for TouchDevelop, from yours truly, including the original Flappy Bird tutorial (All in a Flap) and Tap a Mole: http://touchdevelop.weebly.com/hour-of-code-2.html Also check out my festive 8-bit Pixel Art challenge: http://touchdevelop.weebly.com/hour-of-code.html Khan Academy Khan Academy - https://www.khanacademy.org/hourofcode - has a selection of video tutorials for hour of code week suitable for students, teachers and parents. An Hour of Python An Hour of Python - https://hourofpython.com/ - has a collection of tutorials to introduce programming in Python using the turtle module. Code Academy (Hour of Code) Code Academy - http://www.codecademy.com/goals/hour-of-code - gives students the chance to learn JavaScript by creating an interactive animation. Raspberry Pi.org Raspberry Pi.org - http://www.raspberrypi.org/hour-of-code-dec-2014/ - has some great activities for the Raspberry Pi for hour of code including Carrie Anne’s popular Turtle Snowflake tutorial and my very own Harry Potter Sorting Hat challenge. YouthSpark The Microsoft YouthSpark hub - http://www.microsoft.com/about/corporatecitizenship/en-us/youthspark/youthsparkhub/hourofcode/ - has links to a number of hour of code resources including TouchDevelop and Kodu. Tynker Tynker - http://www.tynker.com/hour-of-code/ - contains a variety of puzzles and activities designed to teach students computational thinking skills and the basics of computer programming. App Inventor App Inventor - http://appinventor.mit.edu/explore/hour-of-code.html - has a selection of tutorials for hour of code to teach students how to create their very own android apps. Lightbot Lightbot - http://lightbot.com/hocflash.html - A version of the popular Lightbot app designed for hour of code. Scratch Scratch - http://scratch.mit.edu/studios/283340/ - has a compilation of scratch projects to be used for hour of code. Scratch Jr Scratch Jr - http://www.scratchjr.org/teach.html - has a selection of downloadable tutorials to be used with their app for hour of code. Have I missed anything? Please let me know if I’ve missed out any hour of code tutorials and I’ll add it to the list! 21/7/2014 Minecraft Pi Edition: SURVIVAL mode-ish
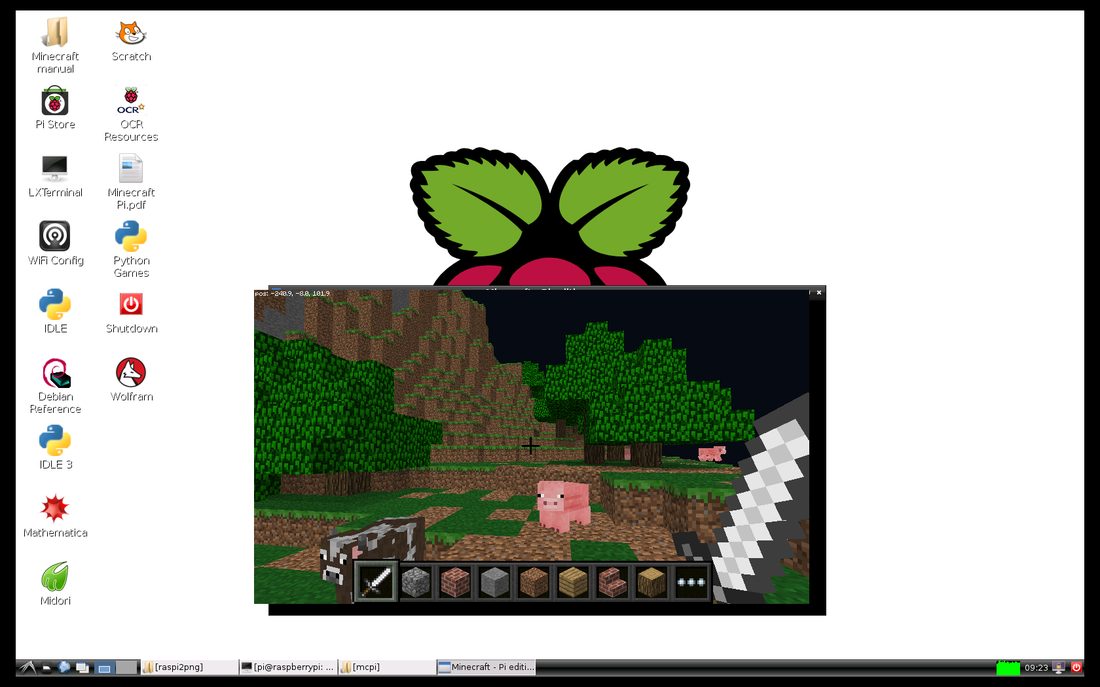
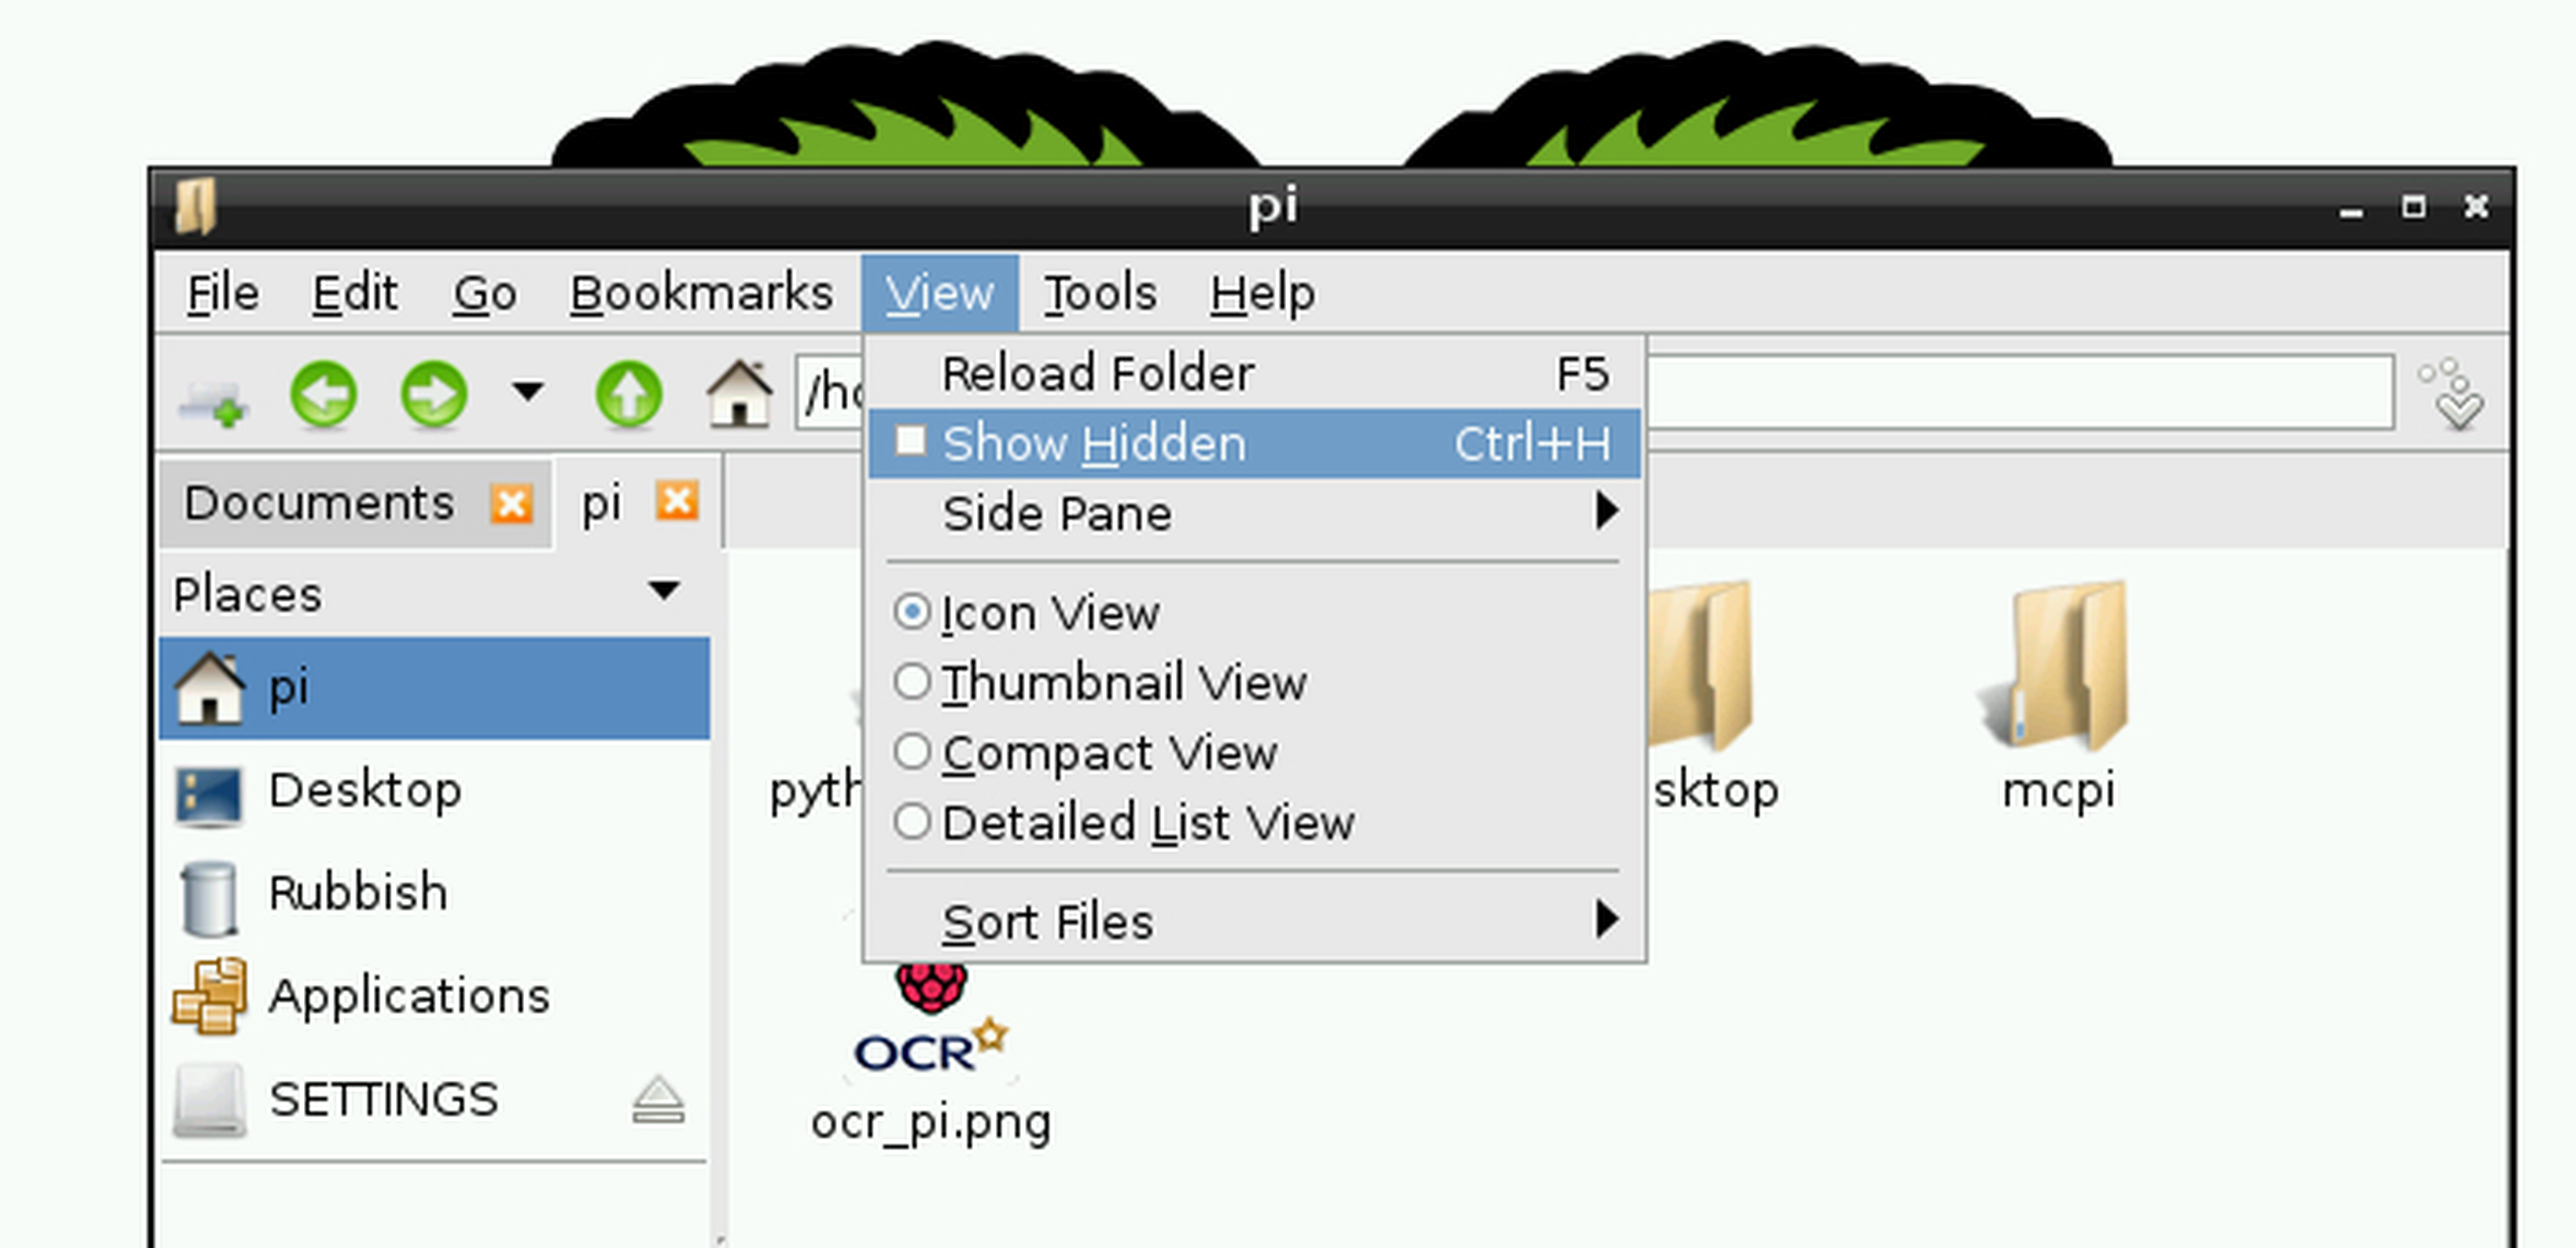
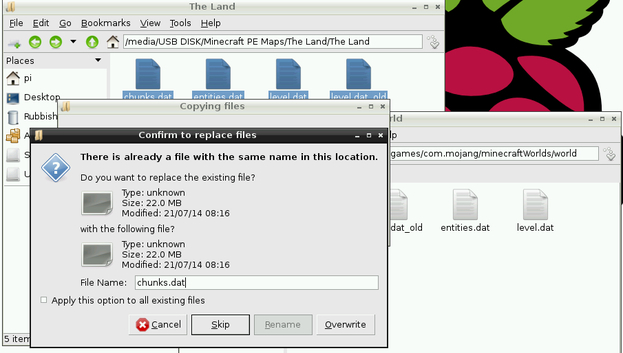
Night time mode with animals in Minecraft Pi: Edition To install and load a survival map in Minecraft Pi Edition: 1. Load Minecraft and create a new world 2. Locate a website that hosts Minecraft Pocket Edition (PE) maps e.g. Minecraft Forums (Note: Although these maps are designed to work on the PE version of Minecraft, as Minecraft Pi: Edition is a port of the PE version, most of the maps should work.) 3. Download a Survival map (Note: If the map is in .zip format, you will need to extract it first) 4. Open “FileManager” 5. Click on “View” and tick the “Show Hidden” box 6. Double click on the folder named “.minecraft” (This is usually located in default your home directory "/home/pi") 7. Double click on the folder named “games” followed by “com.mojang” followed by "minecraftWorlds" (See screenshot below) 8. Copy the contents of your downloaded PE edition map into an existing world folder. (Warning: This will overwrite your existing world) 9. Load Minecraft Pi: Edition
10. Open the new world 22/6/2014 CAS Conference 2014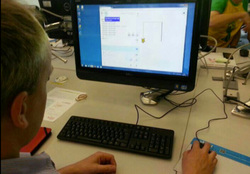 Yesterday was the 6th annual Computing At School (CAS) National Conference. The conference, which was attended by more that 300 delegates, provided an opportunity for teachers to find out about the new curriculum. It also gave teachers the chance to meet and learn from other experienced educators about how to introduce computer science in the classroom. As well as attending a number of inspiring and thought provoking workshops, I was asked to deliver a workshop of my own. I can honestly say it felt an honour to be delivering a workshop along side the likes of Paul Curzon, Mark Dorling and Phil Gardner (to name but a few). It was also great to chat with other educators about how they plan to and, in some cases, how they are already using TouchDevelop to support the delivery of the new curriculum. Unfortunately, due to reasons out of my control, not everyone was able to attend. This was a little disappointing, especially given the size of the computer labs. However, at the request of those who were unable to attend, below is attached a brief synopsis of the workshop along with resources used in the session. If you have any further questions about the resources in this session, or want to find out more about TouchDevelop, please don't hesitate to ask! What is TouchDevelop? TouchDevelop is an online app creation tool from Microsoft Research. Originally designed to develop Windows Phone 7 apps, the TouchDevelop Web App now allows you to develop Windows Store apps suitable for Windows 8 touch screen devices and runs on iPad, iPhone, Android, PC, Mac, Linux. There is also a dedicated TouchDevelop app on the Windows Phone 8. Why use TouchDevelop? No installation required
Workshop Synopsis I started by introducing TouchDevelop and explaining the benefits of using TouchDevelop in the classroom. I then directed delegates to the TouchDevelop Web App and demonstrated how to get started. I followed this with a simple (step-by-step) tutorial using the Turtle library in TouchDevelop. The turtle library is a great tool for introducing students to algorithms. It's also great for introducing iteration as well as discussing the benefits of optimising code. Once everyone had got to grips with the turtle library, I challenged them to try out some of the tutorials (below). Resources Resources used in the session: Links
Tutorials Dice app tutorial
Tap a mole tutorial
Flappy Bird tutorial
TouchDevelop Turing Test (Chat bot tutorial) Lesson plan to support "chat bot tutorial"
Other useful resources touchdevelop hour of code – official tutorials from the touchdevelop team. Build your first app - free online course from Microsoft. touchdevelop challenge hour of code – step-by-step tutorials created to support the UK hour of code. touchdevelop Challenge - series of lessons and challenges to get students building games and apps with touchdevelop. games4learning - Created by David Renton (Extended Lecturer in Games Development: Reid Kerr College, Scotland) A series of YouTube tutorials which introduce students to game design using touchdevelop. Ray Chambers' touchdevelop Scheme of Work - A complete scheme of work for touchdevelop which sees students design and create an app from scratch. With the Controlled Assessment out the way and everyone back safely from their Geography field trip, I decided to let my students relax a little (only a little mind!) and have a go at doing some programming using Python and Minecraft Pi Edition. Lesson Suggested time: 50-100 mins What you will need For each student / group, you will need:
Note: This lesson assumes that students already have some experience of using the Pis and that they have already installed the Raspbian Operating System. To find out how, click here Starter I got students to load their Pis and gave them a copy of the minecraft pi installer files including instructions how to install. You can find the instructions here: http://pi.minecraft.net Activity 1: After all of the students had installed Minecraft Pi edition onto each of their Pis, I gave them a little time to play around with minecraft and get to know the controls. To launch Minecraft Pi Edition on the Pi: Open an LX Terminal session: then, type in the command:
cd mcpi to change to the Minecraft Pi Edition game directory followed by: ./minecraft-pi Activity 2 After about 20 minutes or so of playing around, I invited the students to the front of the class and demonstrated the “Hello Minecraft World” script in Minecraft Pi Edition (click here) I then explained to class that they were going to do some programming in Minecraft using Python. I started by giving each student a copy of the “Hello Minecraft World” python tutorial and asked them to attempt the first task. Those students who completed the task early were instructed to attempt the “Placing blocks” task. Once the students had got to grips with the “Hello Minecraft World” tutorial, I then gave each student a copy of the “Python programming using minecraft pi” student booklet and instructed them to attempt each of the tasks. Plenary: To finish the lesson, I asked for a few volunteers to demonstrate some of their code. (Tip: Ensure that you allocate enough time at the end of the lesson for students to pack away the equipment!). Resources: http://pi.minecraft.net - Installation instructions and download link for Minecraft Pi edition http://www.piprogramming.org/main/?page_id=261 - An introduction to programming Minecraft Pi edition. http://arghbox.wordpress.com/2014/04/25/minecraft-pi-recipe-cards - Python recipe cards for Minecraft Pi http://arghbox.wordpress.com/2013/06/13/programming-minecraft-pi-with-python-early-draft - Programming minecraft pi with python (early draft) http://arghbox.files.wordpress.com/2013/06/minecraftbook.pdf - Python programming / Using minecraft pi and codeacademy (Student booklet) http://arghbox.files.wordpress.com/2013/06/teacheredition.pdf - Python programming / Using minecraft pi and codeacademy (Teacher instructions) http://www.codecademy.com - Great start for learning Python http://www.raspberrypi.org/learning/minecraft-pi/ - Getting started with programming the Minecraft world This week the majority of my class were getting soaked on a Geography field so, with most of my class missing and with the 1st controlled assessment out of the way, I decided to have some fun with the Raspberry Pis and Minecraft Pi edition. What is Minecraft Pi: Minecraft: Pi Edition is a version of Minecraft that’s designed to work on the Raspberry Pi. The Pi edition has the added feature that you can program it using either Python or Java. What you will need:
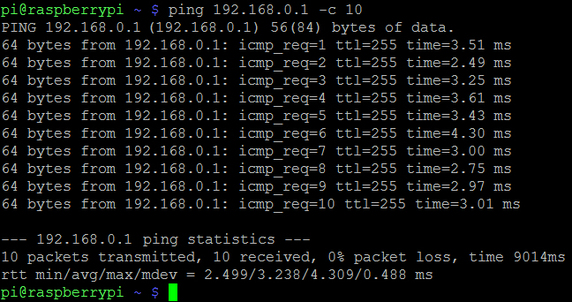
* This setup is designed for 4-8 students working in pairs (ideal for an after-school club). You may need to add more routers / Raspberry Pis depending on the size of your class. Note: If your want to do this with a whole class, look out for my blog post on networking the Raspberry Pi (coming soon!) ** This lesson assumes that students already have some experience of using the Raspberry Pi and that they have already installed the Raspbian Operating System. To find out how, click here Starter: I got students to setup their Raspberry Pis and gave them a copy of the Minecraft Pi installer files (along with installation instructions). You can find the instructions here: http://pi.minecraft.net Activity 1 (Installing & getting to know Minecraft Pi): After all of the students had installed Minecraft Pi edition onto each of their Pis, I gave them a little time to play around with Minecraft and get to know the controls. Activity 2 (Networking the Raspberry Pis): After about 20 minutes or so of playing around, I invited the students to the front of the class and explained to them that they were going to network their Raspberry Pis. I explained that every computer has a unique IP address and that this unique address enables it to communicate over a wide area such as the Internet. I explained that the IP address is made up of four numbers (ranging from 0 to 255) and separated by 3 dots. I then showed the following example on the board: 192.168.0.1 I explained that the IP address can be either entered in manually or can be configured automatically using a Dynamic Host Configuration Protocol (DHCP) Server. I explained that, because our router had a built-in DHCP server, the router would automatically assign a unique IP address to each of the Raspberry Pis once they are connected to the network. I then asked the class what they thought the benefit are of using a DHCP server – looking for answers such as “You don’t have to manually assign the IP address for every device on the network” and “The DHCP will ensure that every device has a unique IP address” etc. Note: All modern routers should have a built-in DHCP server and this service will normally be turned on by default. The Raspberry Pi will automatically send out DHCP request as soon as it is connected to the network and therefore should be assigned an address automatically without any user intervention. Extension: At this point, you could also discuss other significant network terms such as default gateway, subnet mask, broadcast, DNS, MAC address etc., however, as I will be looking at networks in more detail later on in the course, I felt that it was beyond the scope of this lesson. Next, I gave each student a CAT 5 lead and asked them to connect one end to their Raspberry Pi and the other end to a spare port on the Router. Once the students had done this, I asked them to test if their device had successfully connected to the network by checking to see if it had a valid IP address. To check that the Raspberry Pi has a valid IP address, open an LX Terminal session: Then, type in the command: ip addr. You should see similar to the following output: If everything has been setup correctly, your Raspberry Pi should have a valid IP address. In the screenshot above, the Raspberry Pi has been configured with the following IP address: 192.168.0.90 Next, I instructed the students to test the network further by pinging the router. You can obtain or manually change the routers IP address by logging into the router itself (See your routers instruction manual). Usually, by default, the IP address of the router will be 192.168.0.1 To ping the router: Open an LX Terminal session then type in the command: ping followed by the IP address of your router. In our case, the students typed in ping 192.168.0.1 See below: This image above shows a ping between a Raspberry Pi and the router which, in this case, has an IP address of 192.168.0.1 The –c 10 option sends 10 packets and the echo replies are shown above with the time taken. Activity 3: (Multiplayer Minecraft Pi) Finally, once all the students had successfully networked their Raspberry Pis, I asked one of my students to launch Minecraft Pi edition on their Raspberry Pi and asked him to “Start Game”. Once Minecraft had loaded, I then asked the rest of the class to also launch Minecraft on their Pis however, this time, to “Join Game”. We finished the lesson with a bit of Multiplayer Minecraft! Hint: When the other students click on “Join Game”, they will need to select “Steve Pi” - Don’t ask me why :) Resources: http://pi.minecraft.net - Installation instructions and download link for Minecraft Pi edition http://www.ocr.org.uk/qualifications/by-subject/computing/raspberry-pi/ - OCR Raspberry Pi: Getting started tutorials http://www.raspberrypi.org/help/quick-start-guide/ - Raspberry Pi quick-start guide |
AuthorSimon Johnson Microsoft Innovative Educator Expert / MIE Trainer
Minecraft Cert. Educator / Global Mentor
CAS Master Teacher
Raspberry Pi Cert. Educator
Tickle Ambassador
Archives
June 2017
CategoriesAll Algorithms Cpu Fundamentals Hardware Input & Output Memory OCR A451 Software Storage |
||||||||||||||||||||||||||||||||||||||||||||||
Search by typing & pressing enter












 RSS Feed
