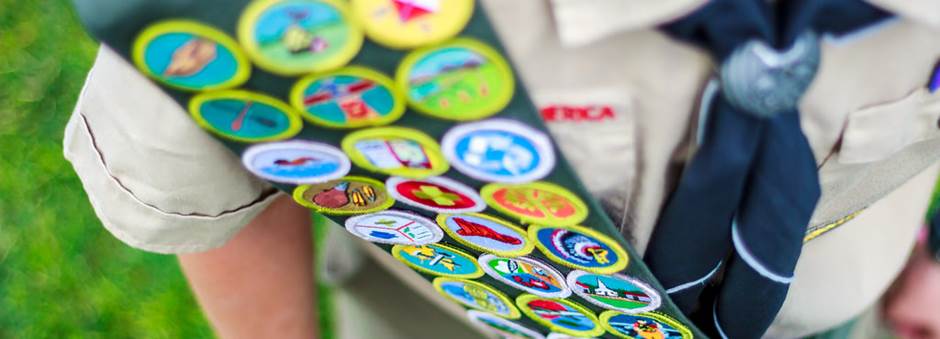
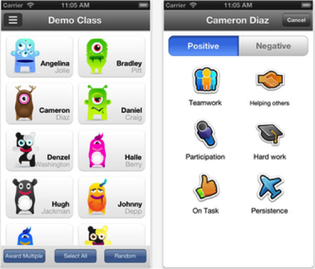
 Image by Jeff Harmon, used under a Creative Commons Attribution 2.0 Generic license (Flickr image link) We all remember our first visit to the dentist, some more traumatic than others. However, you may also remember how one little sticker made everything seem much better! You may also remember your first swimming badge or asking your Mum to sew on your first badge from Scouts or Guides! Well it’s good to see that, despite living in a high-tech world, badges and stickers can still be used to incentivise both students and adults alike! What’s changed? The impact of using stickers in the classroom is well documented however, thanks to improvements in technology, the way in which we award and manage rewards in the classroom has got a whole lot better! Digital Badges Digital badges are online representations of skills / achievements you’ve earned. These can range from demonstrating good behaviour to accomplishing a new skill. There is a wealth of tools available to help you manage and reward digital badges. Here are just a few of my favourites: 1. ClassDojo ClassDojo - classdojo.com - helps teachers improve behavior in their classrooms quickly and easily. It also captures and generates data on behavior that teachers can share with parents and administrators. Teachers can use ClassDojo to award badges for behaviour and give students real-time feedback while in class. 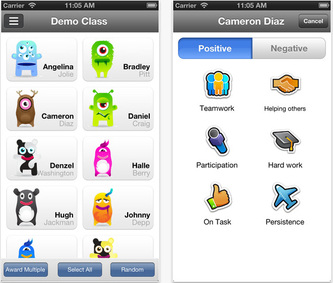 ClassDojo provides instant notifications for your students (‘Well done Josh! +1 for teamwork!’). All fully customizable for your classroom. Students can track their behaviour from home and Parents / Carers can also view their child's progress via the ClassDojo app via a special invitation code.  2. Edmodo Edmodo - edmodo.com - is a FREE 'Social Networking' environment for students, parents and teachers. It provides a safe and easy way for your class to connect and collaborate, share content, and access homework, grades and school notices. In fact, many schools are ditching their VLE's in preference to Edmodo. Teachers and students can post messages, discuss topics, assign and grade work. Edmodo also allows you to share digital content such as links, pictures, videos, documents etc. A feature of Edmodo is the ability to award badges for positive behaviour. This feature allows you to incentivise your students and provide recognition for their achievements. 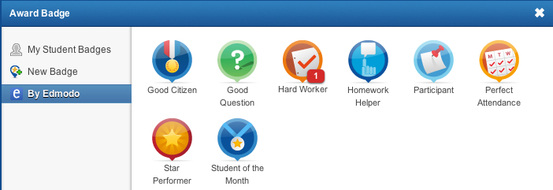 Edmodo also allows you to create your own badges by uploading a 114 x 114 pixel image and, if you need a little inspiration before you start creating your own badges, you can easily view and add other teacher’s badges to your collection. 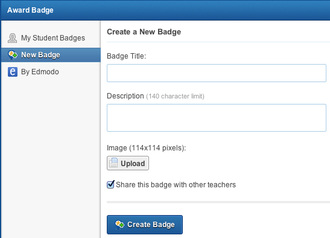 And, just in case you feel left out, as a teacher you too can earn badges!  The Edmodo Training Badge - a way of recognising teachers’ efforts to enhance their knowledge of Edmodo 3. Classroom Carrots Classroom Carrots - http://www.classroomcarrots.com - Thanks to @TeacherToolkit for sharing this. (See his original post here) Classroom Carrots is a free tool to help teachers manage student behaviour and improve engagement. Classroom Carrots is different in that it combines physical stickers, which can be purchased from its parent site (schoolstickers.co.uk), and matches them to virtual stickers which can be recorded online using a free app. Each student is assigned their very own avatar, a computer-generated virtual identity, and when rewards are given out teachers simply drag and drop the virtual sticker onto the relevant avatar. Immediately the pupil's name and reward flash up on the classroom whiteboard or computer. Pupils are then given the matching physical sticker, and if requested, an email can automatically be sent to parents to keep them informed. 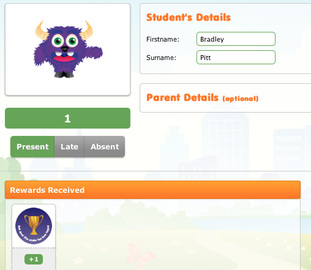 Classroom Carrots allows the teacher to reward individual pupils in real-time and keep track of their behaviour online. Teachers can also engage with parents by using the Reward Book module as well as evaluate performance using the reporting tool. How it works: Open Badges Open Badges is a new digital reward system which allows students to verify their skills, interests and achievements and store them all in one place. The badges are awarded by completing a series of tasks or meeting a set of criteria for which students must supply evidence. What makes these different to other online reward systems is that all the evidence such as, criteria, name of issuer, date of issue, student’s evidence and standards for each achievement are stored or ’baked‘ inside each badge in the form of metadata. 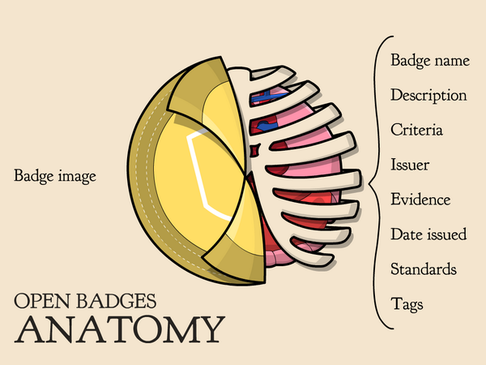 Anatomy of an Open Badge (Image by Kyle Bowen) Open Badges make it easy to…
Source: OpenBadges.org Sharing what you've learned When students reach the age of 13, they can store all their badges in a “Digital Backpack”. Once in their backpack, students can share their skills and achievements anywhere on the web including social networking profiles, job sites, wikis and personal blogs. Digital Badges: Unlocking 10 Million Better Futures Making waves with Open Badges One model which demonstrates how Open Badges can successfully be used to recognise and reward student achievement is Makewaves. Makewaves - https://www.makewav.es/ - is a safe social learning platform for 5-19 year olds (ideal for students and teachers). Makewaves fully integrates with Mozilla Open Badges allowing teachers to make and award badges to their students. Students under the age of 13 can earn badges through Makewaves and convert them to open badges when they are old enough. Badges are currently available from a number of organisations including Computing At School, Rising Stars, Comic Relief and the National Literacy Trust. 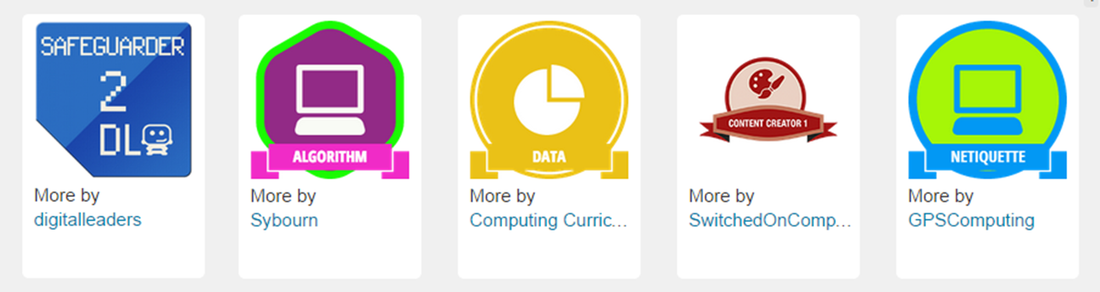 Just some of the badges available through Makewaves. Where to start
Useful links
Case Studies
teachwithict is not responsible for the content of external sites.
5 Comments
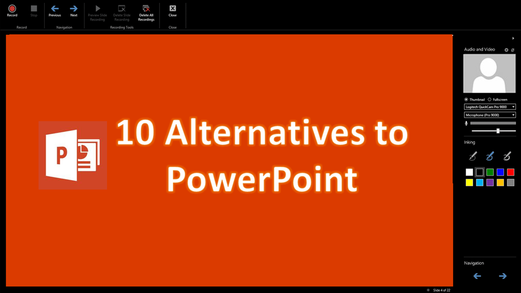
Not so long ago, I mentioned a yet to be named add-in for Microsoft PowerPoint which was set to revolutionize how we create and share presentations. Well, finally, I’m now able to let you in to the little secret. Introducing Office Mix Courtesy of a free plugin for Office 2013 called Office Mix, you can now turn your PowerPoint presentations into interactive online lessons. So, what can you do with Office Mix? Record and share your presentations: Office Mix not only allows you to record audio or video of yourself presenting but will also record your slide annotations as you speak. Office Mix will also allow you to record full screen video captures of your desktop which you can embed into your presentation at the touch of a button. Create interactive quizzes: With Office Mix, you can easily add quizzes to your Presentation such as true/false, multiple choice, free response and polls. Office Mix gives you full control of your quizzes including how many attempts a student can have on each question and how much time they have to complete the quiz. Mix also offers the ability to include hints and feedback based on the students response. Embed apps and webpages: As well as giving you the ability to insert quizzes into your presentations, Office Mix also enables you to embed webpages and interactive apps. Included in the list of apps currently offered in Office Mix are apps from the very popular Khan Academy and CK-12 Foundation. Present and share: Once your presentation is ready, you can share it with your class or upload it to the Office Mix Gallery and share your masterpiece with the world! Once uploaded, Mixes can be viewed on almost any device and most up-to-date browsers. 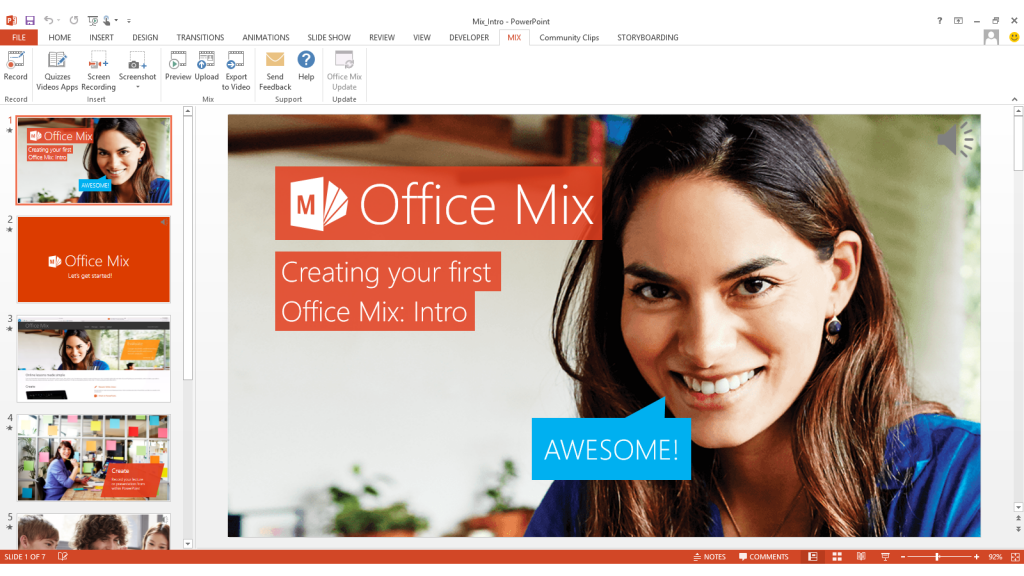 Turn your PowerPoint presentations into interactive online lessons with Office Mix. Flipping your classroom with Office Mix If you are new to the idea of the flipped classroom, the concept is simple – what is usually done in the classroom is done as homework and what is usually done as homework is done in the classroom (essentially reversing the traditional way of instructional teaching). The benefit of this model is that the teacher spends less time teaching the theory and more time interacting with students (class time is used more effectively to tackle problems, challenge misconceptions and explore concepts in more detail). Office Mix is perfect for flipping your classroom – students can research a topic at home and use lesson time more effectively. With near-instant analytics, you can monitor students progress and see how well they do on your quizzes. You can even check to see if your students have actually viewed the resources you have shared with them and how long they spend on each slide. How to get started with Office Mix This help guide will help you with setting up your first Office Mix: https://mix.office.com/Home/GettingStarted In this video you will learn where to download the PowerPoint Add-In and how to get started: Examples: Here’s my attempt at creating a lesson on the Water Cycle using Office Mix Want more examples? Then why not check out the gallery: mix.office.com/Gallery
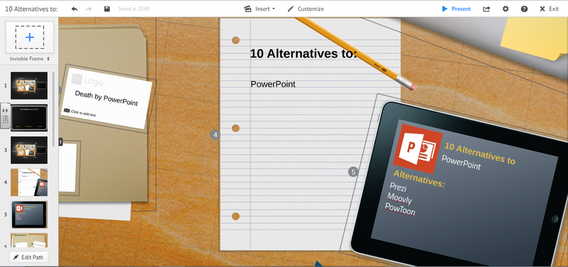
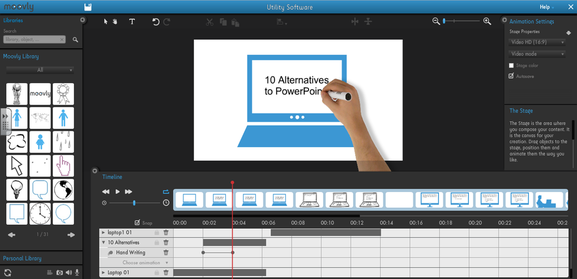
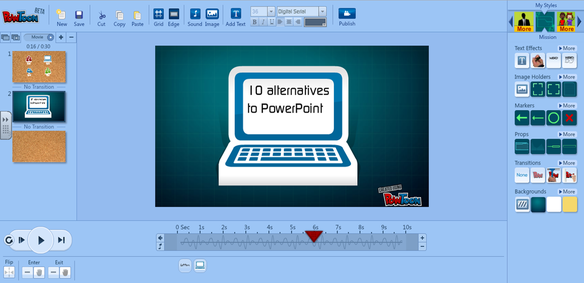
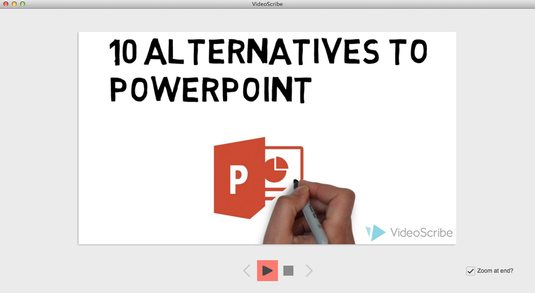
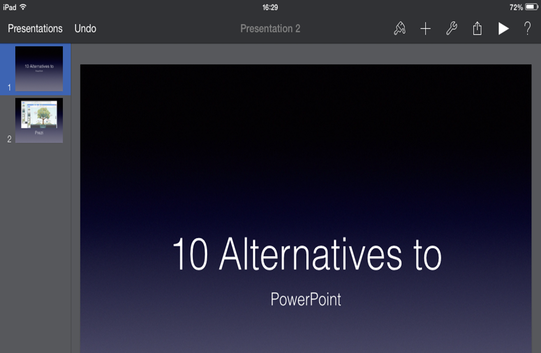
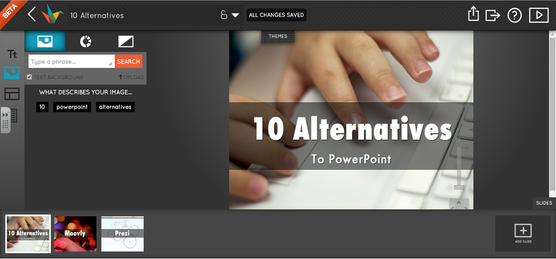
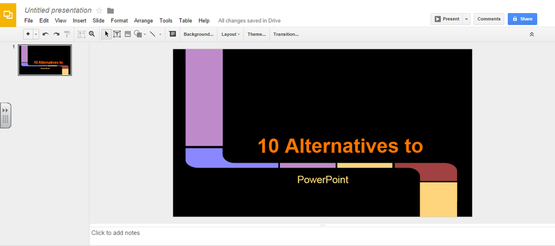
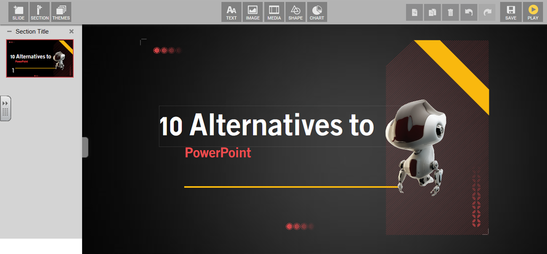
To find out more or to download the add-in, visit: mix.office.com/ 5/10/2014 0 Comments 10 Alternatives to PowerPoint Fed up with “Death by PowerPoint”? Then check out some of these great alternatives: 1. Slides Slides – slides.com – is a simple but effective tool for creating and sharing presentations online. Slides greatest feature is its simplicity – no unnecessary animations or fancy effects. Instead, Slides main focus is to create simple, clean but professional looking slide presentations. Best of all, Slides uses HTML 5 so will work on a variety of devices and platforms (no plugins required). 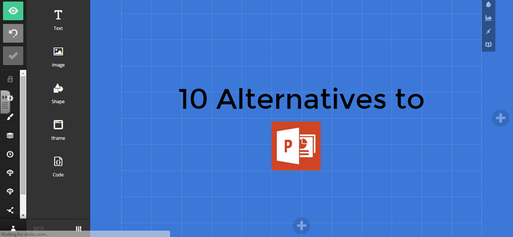 Create simple but effective looking presentations with Slides.
|

| Edmodo is a FREE 'Social Networking' environment for students, parents and teachers. It provides a safe and easy way for your class to connect and collaborate, share content, and access homework, grades and school notices. In fact, many schools are ditching their VLE's in preference to edmodo. A feature of edmodo is the ability to award badges. This feature allows you to incentivize your students and provide recognition for their achievements. Edmodo also allows you to create your own badges by uploading a 114 x 114 pixel image and, if you need a little inspiration before you start creating your own badges, you can easily view and add other teacher’s badges to your collection. | 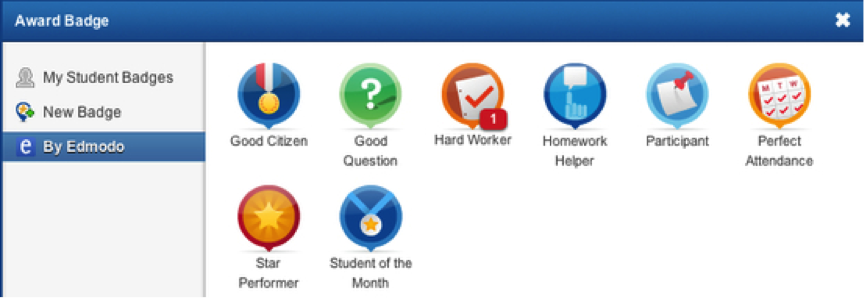
|
| Classroom Carrots is a free tool to help teachers manage student behavior and improve engagement. Classroom Carrots is different in that it combines physical stickers, which can be purchased from its parent site (schoolstickers.co.uk), and matches them to virtual stickers which can be recorded online using a free app. Each student is assigned their very own avatar, a computer-generated virtual identity, and when rewards are given out teachers simply drag and drop the virtual sticker onto the relevant avatar. Immediately the pupil's name and reward flash up on the classroom whiteboard or computer. Pupils are then given the matching physical sticker, and if requested, an email can automatically be sent to parents to keep them informed. | 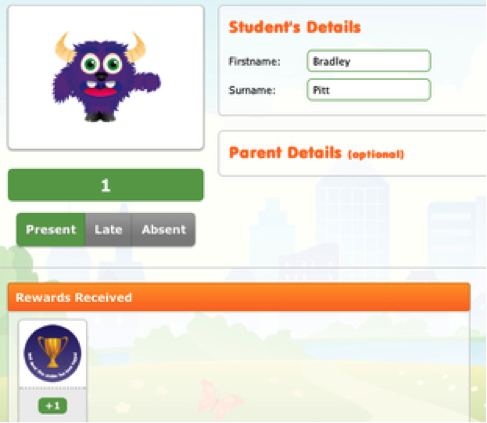
|
| Zondle incorporates many of the game mechanics that embody gamification methodology, mechanics such as earning zollars (zondle dollars) and the use of leaderboards to keep students engaged. Zondle enables teachers and students to create games to support their learning. Teachers create and set topics on the zondle website for their students to play in games of their choosing. Students can also use the zondle to create their own topics to match exactly what they want to learn. | 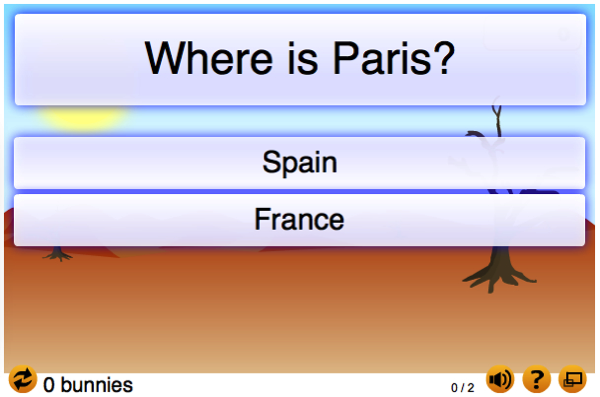
|
| Code Academy is a free online tool which teaches students to code. Code Academy gamifies learning by awarding badges and points for completing lessons and courses. | 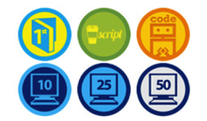
|
One tool that I use regularly to gamify my lessons is ClassDojo. ClassDojo allows you to reward students with badges for things such as good behavior, working well as a team or just for being on task.
ClassDojo also allows you to provide instant feedback to your students (‘Well done Josh! +1 for teamwork!’) and is fully customizable for your classroom. Students can track their behavior from home and Parents / Carers can also view their child's progress via the ClassDojo app via a special invitation code.
ClassDojo also allows you to provide instant feedback to your students (‘Well done Josh! +1 for teamwork!’) and is fully customizable for your classroom. Students can track their behavior from home and Parents / Carers can also view their child's progress via the ClassDojo app via a special invitation code.
Game based learning
Game based learning (GBL) is the process of using games to achieve a defined set of learning outcomes.
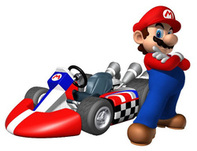
Games that generate data e.g. Kinect Sports and Mario Kart are great for teaching Maths and Statistics. Games that tell a story are great for developing creative writing. Puzzle games can develop problem solving and physics based games such as Angry Birds can be used to explain velocity and momentum.
For example, you could play part of a game and ask students to describe what they saw and what they heard. You could ask students to write a story about what happens to the character next or to create a character of their own – complete with biography. You could have a race and record the lap times and use them to work out mean, mode and median or use a game to start a Socratic debate.
One game I have used to great affect is Mario Kart. I have used it to teach Spreadsheet Skills however, the same principles can be used to teach statistics or graphs.
In order to practice spreadsheet skills, students take it in turns to complete laps using Mario Kart on the Nintendo Wii. The students then compile the raw data generated by the class and input these into a suitable spreadsheet. The students then use basic and advanced skills to improve the look and functionality of their spreadsheet. Note: You don’t have to use Mario Kart! You can use any game that generates scores or lap times. You can find copies of the lesson plans and resources for this activity here: Mario Kart Spreadsheet Challenge
Obviously, as with introducing any new technology to the classroom, game based learning requires sound pedagogy in order to be successful. Using games in the classroom can also serve up unique challenges. One of the main challenges is how to share one console with a class full of students and how do you can prevent certain students dominating the activity or the activity itself distracting from everything else. Here are some suggested strategies to support games based learning:
Game based learning (GBL) is the process of using games to achieve a defined set of learning outcomes.
Games that generate data e.g. Kinect Sports and Mario Kart are great for teaching Maths and Statistics. Games that tell a story are great for developing creative writing. Puzzle games can develop problem solving and physics based games such as Angry Birds can be used to explain velocity and momentum.
For example, you could play part of a game and ask students to describe what they saw and what they heard. You could ask students to write a story about what happens to the character next or to create a character of their own – complete with biography. You could have a race and record the lap times and use them to work out mean, mode and median or use a game to start a Socratic debate.
One game I have used to great affect is Mario Kart. I have used it to teach Spreadsheet Skills however, the same principles can be used to teach statistics or graphs.
In order to practice spreadsheet skills, students take it in turns to complete laps using Mario Kart on the Nintendo Wii. The students then compile the raw data generated by the class and input these into a suitable spreadsheet. The students then use basic and advanced skills to improve the look and functionality of their spreadsheet. Note: You don’t have to use Mario Kart! You can use any game that generates scores or lap times. You can find copies of the lesson plans and resources for this activity here: Mario Kart Spreadsheet Challenge
Obviously, as with introducing any new technology to the classroom, game based learning requires sound pedagogy in order to be successful. Using games in the classroom can also serve up unique challenges. One of the main challenges is how to share one console with a class full of students and how do you can prevent certain students dominating the activity or the activity itself distracting from everything else. Here are some suggested strategies to support games based learning:
- Use a random name selector to choose who goes first. (Alternatively, if you don’t have access to a random name selector, you could use a hat with names in or tin full of lolly pop sticks with student’s names written on them.)
- Use multi-player games – This will allow more than one student to play at the same time.
- Schedule the game playing during a lunch or after-school session so that lesson time can be used to focus on the linked activity or learning objectives.
- Plan a secondary activity that supports the main activity and keeps the rest of the class engaged for example, ask students to record the results of each race/round as they happen or give each student a card with a secret task/mission written on them to complete whilst they are not playing the game.
Game design
Game design, as the name suggests, is the process of planning the content and rules of a game. It also includes the design of gameplay, environment, storyline and even characters.
A great way to engage students in a subject or topic is to get them to create a game to teach others that topic. Students don’t have to have any programming / coding skills to design the game however, game design does lend itself well to the teaching of computing / computer science. Thankfully, there is an abundance of online tools to support game design – not all of them requiring experience or knowledge of coding:
Gamestar Mechanic uses fun, game-based quests and courses to help you learn game design and make your own video games.
Game Make: Studio makes it easy to create great games without having to learn a programming language or spend a lot of time. Many tutorials and resources are available, along with a lot of help from the community.
TouchDevelop is an online app creation tool from Microsoft Research. Originally designed to develop Windows Phone 7 apps, TouchDevelop has recently been updated as a web app and now allows you to develop Windows Store apps suitable for Windows 8 touch screen devices. TouchDevelop is easy to use and works with several web browsers.
Kodu is a new visual programming language made specifically for creating games. It is designed to be accessible for children and enjoyable for anyone. The visual nature of the language allows for rapid design iteration using only an Xbox game controller for input (mouse/keyboard input is also supported).
Scratch is a project out of the MIT Media Lab. It allows users to program their own interactive stories and games with animated content. Scratch is specifically designed to make programming accessible for students (they recommend ages 8 and up). The website hosts support materials, user-created content and sample code to help you get started. The Media Lab has a license deal with LEGO to allow users to use LEGO characters in their Scratch projects.
MissionMaker allows students to rapidly create visually 3D rich worlds for first-person 'Missions' - complete with sets, animated characters, dialogue and music.
Stencyl is a free game creation platform that allows students to create 2D games for mobile devices and for the web. The software is also available in paid format. This gives you the ability to upload your finished games to the iTunes App Store.
GameSalad allows members to design, publish and distribute original games without programming knowledge, and play with others across multiple platforms, such as the iPhone, iPad, Mac and any other Internet-connected device.
Alice is a free and open source 3D programming environment designed to teach students object-oriented and event-driven programming. In Alice, students drag and drop graphic tiles in order to animate an object and create a program. Alice is great for creating an animation for telling a story, playing an interactive game, or a video to share on the web. Extensive support materials are provided.
Quest allows you to create your very own 80's style text adventure games. Quest has a variety of uses in education, within a range of subjects and at a range of levels. Best of all, it's free. Perhaps the most obvious use of Quest is within ICT/Computing. Quest provides a gentle introduction to programming concepts – variables, functions, loops, expressions, objects, etc. – and the visual editor means that students don’t need to remember commands or syntax.
App Inventor is a great tool to teach programming to high school students. Like Scratch, App Inventor uses a drag-and-drop interface that allows you to assemble block commands and from these, build your app.
I have begun to explore the idea of using game design to teach programming and have developed a 15 week Scheme of Work to teach students how to create games for Windows phone and Windows 8 devices using Microsoft’s TouchDevelop web app.
I start by getting students to explore existing games and discuss what makes a good or bad game. Next I focus on what are the main components of a game e.g. lives, score, levels etc. I then split the class into small teams and ask them to each choose a role e.g. graphics artist, sound designer, lead programmer etc. I then ask them to come up with an idea for their game and create a storyboard. Once the students have agreed on an idea, and it has been approved by their teacher, the students start creating their game using TouchDevelop. Finally, once the game is complete, the students test and evaluate their game.
Click here to find out more about TouchDevelop or to download the Scheme of Work.
Gamification, Game based learning or Game design – which one should you choose?
It’s clear that using games and game-like elements in the classroom can foster collaboration, problem solving and critical thinking skills. They can also encourage students to work interdependently. So, which one do you choose? The simple answer is that it all depends on your learning objectives / desired outcomes. Want to modify / improve behavior? Then gamify your lessons. Have a desired set of learning objectives which you want to explore in a fun and engaging way? Choose game based learning! Want your students to make a game to use in the classroom? Choose game design. Whichever you choose, have fun and don’t be afraid to experiment!
It’s clear that using games and game-like elements in the classroom can foster collaboration, problem solving and critical thinking skills. They can also encourage students to work interdependently. So, which one do you choose? The simple answer is that it all depends on your learning objectives / desired outcomes. Want to modify / improve behavior? Then gamify your lessons. Have a desired set of learning objectives which you want to explore in a fun and engaging way? Choose game based learning! Want your students to make a game to use in the classroom? Choose game design. Whichever you choose, have fun and don’t be afraid to experiment!
26/3/2014
Using QR codes in the classroom
What is a QR code?
A QR code (short for Quick Response Code) is a machine-readable code made up of black and white squares.
Example of a QR code:
A QR code (short for Quick Response Code) is a machine-readable code made up of black and white squares.
Example of a QR code:
QR codes are designed to enhance printed material such as: books, magazines, programmes and guides or even displays at museums and heritage sites.
Using an array of free apps and online tools, you can quickly and easily create your very own multimedia-rich QR experiences which can be triggered from a web enabled device.
Suggestions for using QR codes in the Classroom:
General:
Science:
Geography/History:
Art:
Examples:
Using an array of free apps and online tools, you can quickly and easily create your very own multimedia-rich QR experiences which can be triggered from a web enabled device.
Suggestions for using QR codes in the Classroom:
General:
- Create an interactive wall display.
- Create a QR treasure hunt in which students have to retrieve clues from strategically placed QR codes in order to solve a problem.
Science:
- Create a QR Solar System - Gather YouTube videos, websites etc. about the Solar System and link them to QR codes. Scatter each of the codes around the room and ask pupils to put them in order.
- Create a QR version of the Periodic Table
Geography/History:
- Create an interactive visitors centre. Students can use their favourite software to create interactive content which they can upload to the internet and link to QR codes. The QR codes can then be used to inform visitors about a local place of historical interest.
- Create a QR timeline.
Art:
- Create an Interactive Tour Guide - Contact your local Art Gallery and get your students to create an interactive tour to provide visitors with additional information about the gallery's works.
Examples:
| 
|
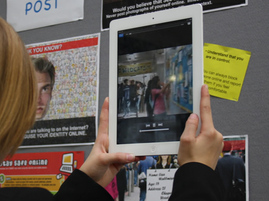
Interactive eSafety wall display
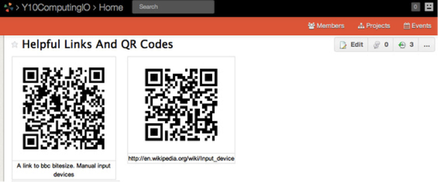
Students create a revision resource using QR codes
Using QR Codes in the Classroom
What you will need for creating your own QR experience
1. A web enabled device with built in camera (e.g. tabet, netbook or smart phone)
2. QR creation tool
3. QR reader
Instructions
1. Install and load your preferred QR creation tool.
2. Paste in the URL of the website or content you wish to trigger from your QR code.
3. Print out the automatically generated QR codes.
4. Install and run your preferred QR reader.
5. Point your devices camera at your newly created QR code.
6. Have fun!
Please let me know how you are using QR Codes in your classroom!
1. A web enabled device with built in camera (e.g. tabet, netbook or smart phone)
2. QR creation tool
- Qrafter (iOS)
- QR Code Designer (Windows 8)
- Barcode Generator (Android)
- QR Stuff.com (Web)
3. QR reader
- kwiQR (Windows 8)
- QR Reader (iOS)
- QR Reader from Kaywa (Android)
- QuckMark QR Reader (PC/Mac)
Instructions
1. Install and load your preferred QR creation tool.
2. Paste in the URL of the website or content you wish to trigger from your QR code.
3. Print out the automatically generated QR codes.
4. Install and run your preferred QR reader.
5. Point your devices camera at your newly created QR code.
6. Have fun!
Please let me know how you are using QR Codes in your classroom!
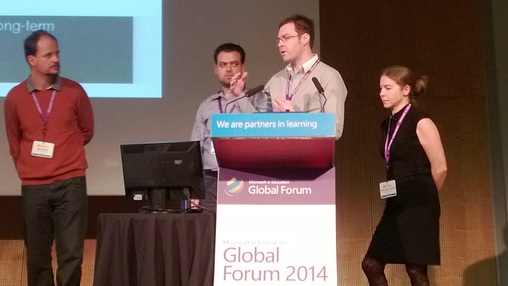
I was recently lucky enough to be invited to attend the Microsoft in Education Global Forum held in Barcelona. This annual event aims to recognize and celebrate the achievements of educators who are preparing students for life in the 21st century. Each year, Microsoft brings together participants from the Microsoft Innovative Educators Program and the Microsoft Innovative Schools Program for an energetic, collaborative conference. This high profile event is attended by more than 1000 of the world’s most innovative educators, school leaders, and education leaders from 75 countries, along with government officials.
Rather than provide a day-by-day account of the Global Forum, for this you can check out the excellent blogs from other expert educators (David Rogers, David Renton, Nikki Cooper & Ray Chambers) I would however, like to reflect on what I have learnt as a result of attending the global forum and emphasize some of the key points and highlights of the whole experience.
May I start by saying that I felt honored to be chosen as one of 10 educators to represent the UK at the Microsoft in Education Global Forum and privileged to part of a 250 strong delegation of expert educators from around the world. I would also like to say, as other expert educators have expressed, that I felt humbled having met some of the other educators from around the world and having witnessed the profound impact others are making both locally and globally through their projects, and in some cases, with access to little or limited technology.
2014 Global Forum - Recap video:
Can you spot a cameo from me?
Highlights
A major theme of the Global Forum was the exhibition. This gave the expert educators an opportunity to showcase their learning activities. However, If I have one criticism of the forum, it would be the lack of time to discuss with other educators about their projects.
A major theme of the Global Forum was the exhibition. This gave the expert educators an opportunity to showcase their learning activities. However, If I have one criticism of the forum, it would be the lack of time to discuss with other educators about their projects.
Prepare to be judged – A last-gasp attempt to explain to the judges the merits of my project
Of the projects I did have chance to see, one of my favourites was an entry from the Ukraine called “Folk Tales”. The premise was simple - Students find out about folk tales from their region, present them in pictures or in other creative form, retell them and translate into English. They then share their creations online. Students, from other countries, then view the uploaded materials and try to reinterpret the story from the material. The students then upload their interpretation of the story to the Internet and compare it to the original tale.
Another highlight of the event was Anthony Salcito’s (Worldwide Vice President for Microsoft Education) keynote. In his keynote, Anthony reminded us of the vital role we play as teachers and referred to us as heroes and champions, in his eyes, for the work that we do to educate the young people of today!
Also in his keynote, Anthony highlighted some examples of the innovative use of technology to support teaching and learning. Probably the most memorable example was a project called “Mystery Skype”.
Anthony also used his keynote to showcase a number new tools to use in the classroom. Some of the highlights included:
Project Spark – Best described as Kodu for grown-ups. Project Spark builds on the success of Kodu by offering the same easy to use event-driven programming interface however, takes Kodu to the next level with its stunning 3D graphics and downloadable additional content. Find out more about Project Spark here: Project Spark
Un-named add-in for PowerPoint – Although I’m not at liberty to say much about this new future enhancement for PowerPoint however, what I can say is, it will completely change the way in which we use PowerPoint!
OneNote – Now available free for Mac, OneNote continues, in my opinion, to be one of the most powerful tools for educators. With OneNote, teachers can organize their thoughts or plan their lessons and access these quickly and easily via a simple search. Teachers and students can communicate with one another and collaborate on projects (Perfect for Project-Based-Learning). The teacher can also collate notes at the end of each lesson or keep notes on individual students or each of their classes.
ClassPolicy - A free classroom management solution for Windows 8 devices. With ClassPolicy, teachers can eliminate distractions by restricting web and application access, orchestrate their classes by automating the sequence of their lessons, gauge understanding by using quick polls.
Whilst on the topic of useful tools to support teaching and learning, I must also mention our very own Stuart (App Man) Ball and his presentation on his favourite apps for Windows 8 devices. Most notable:
ChronoZoom – An online interactive timeline for visualizing history.
Project Siena – A Windows 8 app that lets you easily create your own Windows business apps in minutes. Click here to find out more.
CreateBook – Allows you to easily create interactive ebooks for Windows 8 devices.
NovaMind Mind Mapping – A complete Mind Mapping tool for Windows 8 devices.
To find out more about educational apps for Windows 8 devices, visit Stuart Ball’s blog: Windows 8 Appedagogy
Probably the most rewarding part of the week was meeting with other educators from around the world and sharing best practice. This started with the learn-a-thon.
The Learn-a-thon
The idea behind the learn-a-thon was to unite expert educators from different countries and challenge them to develop a project which addresses one of three topics (Sustainability, poverty and gender equality) and which encapsulated the concepts of 21 Century Design. Our project was on sustainability and involved students creating apps and online community (blog / wiki etc.) encouraging others to recycle and conserve our natural resources! Although I was a little skeptical at first, I found the process very rewarding. Not only did I learn the true power of Bing Translate for resolving the language divide, I also made a few new friends.
An animated pitch from yours truly on sustainability
The sharing of best practice was epitomized when David Rogers kindly offered to host a European TeachMeet in which, over a few light refreshments, educators from all over Europe showcased how they are using technology to enhance teaching and learning. This wasn't the first time I heard of the idea of TeachMeets however, this was the time I had attended one. I can honestly say that I really enjoyed the experience and will be investigating the possibility of arranging a TeachMeet in my area in the near future!
Key reflections
As well as the usual meeting and greeting, there was also opportunity to hear keynotes from respected and influential educators from around the world. Here are some of the key points:
“It's OK to let student's fail!” – As educators, it is OK to let our students fail however, we must also ensure that we enable our students to reflect and learn from their mistakes.
“Teachers are control freaks we need to let go of the control and let students lead with technology”. – It is easy to underestimate the ability of our students and have pre-conceptions of what they are able achieve. If there is one thing I have learned as a result of my project, it’s that, as teachers, we sometimes need to stake a step back and allow our students to take ownership of their own learning – try, you might just be amazed at what your students are really capable of if you give them the chance!
“Learning has changed - Your students are learning without you”. – With the Internet being more accessible than ever and with an abundance of online tools and resources to support independent learning, our students are learning outside of the classroom. This is no more evident than in the teaching of computer science with many students learning to code online using online tutorials such as those found on YouTube. As educators, we can take advantage of these resources and use them to flip our classrooms. To find out more about the benefits of flipped learning or learn how to flip your classrooms, visit my blog: Make the most of your lessons – flip your classroom
“Collaboration is key!” – Whether you are an educator or a learner, collaboration is an important aspect of learning. If you are new to the idea of collaborative learning or don’t know where to start, start by forming a collaboration with another teacher in your school. This could be a small project or a team teaching exercise. Once you have mastered the art of collaboration in a safe / familiar environment, initiate a collaborative project with a neighboring school or, if you’re feeling really adventurous, try collaborating with another educator online. Social networking tools such as Facebook, Twitter and Edmodo are great places to find other educators with similar interests / ideas. Why not also find out where your next / nearest TeechMeet is. TeechMeets are not only a great place to find new ideas and resources, they are also a place to meet other like minded educators in your local area.
“Don’t make technology the star, make it a tool to create amazing learning experiences.” – A message I echo from Anthony Salcito. Pedagogy must come first, technology second. With the appropriate planning, technology can transform teaching and learning however, what technology cannot do is conceal poor planning / teaching!
Things I would have liked to have seen!
Conclusion
Despite the long days and limited supply of coffee, I can honestly say that I have returned home, not only with a plethora of new ideas and resources but also with a renewed enthusiasm. I have also made some new friends along the way, not forgetting of course Stuart Ball who, along with the rest of the UK team, I wish to thank for all their support!
I would like to finish with a quote from Satya Nadella (Microsoft CEO)
“I truly believe that if you are not learning new things, you stop doing great and useful things.”
Key reflections
As well as the usual meeting and greeting, there was also opportunity to hear keynotes from respected and influential educators from around the world. Here are some of the key points:
“It's OK to let student's fail!” – As educators, it is OK to let our students fail however, we must also ensure that we enable our students to reflect and learn from their mistakes.
“Teachers are control freaks we need to let go of the control and let students lead with technology”. – It is easy to underestimate the ability of our students and have pre-conceptions of what they are able achieve. If there is one thing I have learned as a result of my project, it’s that, as teachers, we sometimes need to stake a step back and allow our students to take ownership of their own learning – try, you might just be amazed at what your students are really capable of if you give them the chance!
“Learning has changed - Your students are learning without you”. – With the Internet being more accessible than ever and with an abundance of online tools and resources to support independent learning, our students are learning outside of the classroom. This is no more evident than in the teaching of computer science with many students learning to code online using online tutorials such as those found on YouTube. As educators, we can take advantage of these resources and use them to flip our classrooms. To find out more about the benefits of flipped learning or learn how to flip your classrooms, visit my blog: Make the most of your lessons – flip your classroom
“Collaboration is key!” – Whether you are an educator or a learner, collaboration is an important aspect of learning. If you are new to the idea of collaborative learning or don’t know where to start, start by forming a collaboration with another teacher in your school. This could be a small project or a team teaching exercise. Once you have mastered the art of collaboration in a safe / familiar environment, initiate a collaborative project with a neighboring school or, if you’re feeling really adventurous, try collaborating with another educator online. Social networking tools such as Facebook, Twitter and Edmodo are great places to find other educators with similar interests / ideas. Why not also find out where your next / nearest TeechMeet is. TeechMeets are not only a great place to find new ideas and resources, they are also a place to meet other like minded educators in your local area.
“Don’t make technology the star, make it a tool to create amazing learning experiences.” – A message I echo from Anthony Salcito. Pedagogy must come first, technology second. With the appropriate planning, technology can transform teaching and learning however, what technology cannot do is conceal poor planning / teaching!
Things I would have liked to have seen!
- More student representation. There was lots of talk about a student centred approach to teaching and learning however, what disappointed me was, a lack of representation from students. Don’t get me wrong, I understand that the whole idea of the Global Forum is to celebrate and reward the innovative work of educators from around the world however, I would have liked to have seen more students celebrated for their part in making many of the projects a success! It was great however, to see the UK leading the way with Saltash.net and their young Digital Leaders (@Offperts). I would also like to congratulate Scott Wieprecht from Saltash and his team of Offperts who received the prize for 2nd Runner up in the cutting edge use of technology category. I would also like to say that the Offperts students were a credit, not only to their school, but also to the UK!
- Greater opportunity to talk to other expert educators about their projects! Maybe for the next global forum, those experts picked to represent their country collaborate on a project (in a similar fashion to the learn-a-thon) before the event and submit the learning activity as a group entry. That way, during the judging and presenting of the learning activities, each team member could take it in turns checking out the other projects whilst the rest of the team attend to their own stand. – Just a suggestion!
Conclusion
Despite the long days and limited supply of coffee, I can honestly say that I have returned home, not only with a plethora of new ideas and resources but also with a renewed enthusiasm. I have also made some new friends along the way, not forgetting of course Stuart Ball who, along with the rest of the UK team, I wish to thank for all their support!
I would like to finish with a quote from Satya Nadella (Microsoft CEO)
“I truly believe that if you are not learning new things, you stop doing great and useful things.”
10/2/2014
Safer Internet Day 2014 Resources
Planning a session for Internet Safety Day 2014? Here are some great resources to get you started!
These videos provide a great starting point for discussing the issues related to Staying Safe Online
Consequences - Suitable for 11-16 year olds
Jigsaw - Suitable for 8-10 year olds but can also be used with 11-13 year olds
Use these videos to discuss the risks of posting information online
Think Before You Post (English)
Think Before You Post (Version 2)
Some great starter videos for discussing online risks
Virtual Global Task Force - Great for demonstrating that people aren't always who they say they are online.
Where's Klaus (English) - Great for discussing about who you are letting in online.
18/11/2013
Anti-bullying resources
It's anti-bullying week, so here's a collection of resources to help you discuss issues related to Cyber-bullying.
Videos
Joe's Story - This film shows ways in which cyberbullying can occur, who it involves, how it can affect different people, and what can be done to prevent it and respond to it. (Suitable for 11-16 year olds)
Talent Show - Cyberbullying Prevention Commercial
Safer Internet Day 2009 - Use this video to explain to students how they can report cyberbullying.
Links
Think U Know - Games, videos, advice and resources illustrating the dangers of cyberbullying.
Standing up, not standing by - A free cyberbullying toolkit for educators from CommonSense Media.
Cyberbullying lesson plan - Lesson plan from BeatBullying (Suitable for all key stages).
Standing up, not standing by - A free cyberbullying toolkit for educators from CommonSense Media.
Cyberbullying lesson plan - Lesson plan from BeatBullying (Suitable for all key stages).
6/11/2013
Top 10 web 2.0 tools
There is a wealth of free resources available online which can be used in the classroom. Below is a selection of my favourites.
1. Animoto If you have never used Animoto in the classroom to create online slideshows, then now is the time to start. With just a few clicks you can quickly turn your photos and videos into an animated, show stopping, musical masterpiece for free! There are numerous ways in which Animoto can be used in the classroom. Biographies, field trips, digital storytelling, science projects and more can all be captured with this quick and easy slideshow tool. For examples of how Animoto can be used in the classroom visit: http://animoto.com/education/case_studies. For more information or to sign up for a free education account visit: http://animoto.com/education |  Above: Students create a video slideshow of American history using Animoto and images taken from the web |
 An interactive presentation on Ancient Greece. | 2. Prezi Prezi - www.prezi.com - is a Flash-based online app that lets you break away from the slide-by-slide approach of most presentation software. Instead, it allows you to create non-linear presentations where you can zoom in and out of a visual map containing words, links, images, videos, and more. To see the true power of Prezi, take a look at some online examples at: http://prezi.com/explore |
3. Xtranormal Xtranormal - xtranormal.com - is a text-to-movie website which allows you and your students to create short films with your own scripts using very clever text-to- speech technology. This means your students write scripts and then feed them into Xtranormal to produce films with characters enacting them. Using Text-to-speech in the classroom As well as motivating students, text-to-speech software can be used to build communication skills. Students can create scripts for their movies and practice their writing, reading, and speaking skills. | 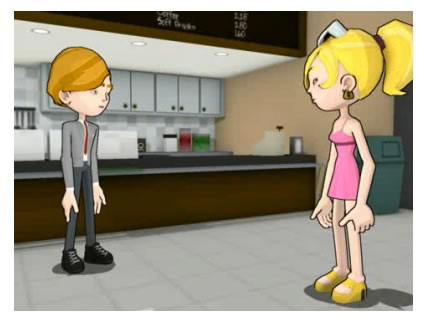 Students brush up on their Spanish skills using Xtranormal. |
| | 4. Voki A Voki is a free service that allows you to create personalised speaking avatars and use them on your blog, website, and in email messages. To get started, visit: http://www.voki.com/create.php |

5. Weebly
Websites and Blogs are increasingly being used in education by teachers and students. Having a classroom website or blog can benefit everyone involved including the students, the teacher, and the parents.
Classroom websites are great places to post news, pictures, homework instructions and teaching resources. Blogs can provide a communication tool that teachers can use with students to develop writing, share ideas and reflect on work being undertaken in the classroom. Free online tools such as 'Weebly' (www.weebly.com) allow teachers to create secure student blogs, or classroom websites, with little or no prior technical knowledge!
For instructions on how to create a website or blog using weebly, click on the links below:
how to create a blog
how to create a website
 | 6. Glogster Glogster EDU - edu.glogster.com - is a fantastic, free, education website for teachers to use with their students. It allows you to create interactive posters that include text, video, hyperlinks, and im-ages. Glogster is a great technology tool to use in the classroom because it is so flexible. You can use it for biographies, time lines, math formulas, instructional writing and experiment results. You can also use Glogster to create resources to support your teaching e.g. Starter or plenary activities. For examples of how Glogster can be used in the classroom visit: http://edu.glogster.com/categories/ |
7. Wikispaces Classroom Wikis are a great places for students to collaborate on projects. Each student could have their own page on which they can be an 'expert' on a subject. You could have a page where students write book reviews, create a classroom newsletter, create an online dictionary of key words, list ingredients / apparatus for the next lesson or just create a place to collect links and resources for a particular topic or lesson. Wikispaces Classroom builds on the collaborative editing features of a wiki but includes some additional functionality to support classroom use, features such as social interaction and formative assessment. How to get started Wikis are really easy to setup however, you will first need to create a free account. Visit: http://www.wikispaces.com/site/for/teachers to get started. For instructions on how to create a wiki using wikispaces, click on the link below: how to create a wiki |  Geography students work together to create a Wiki about India. |
 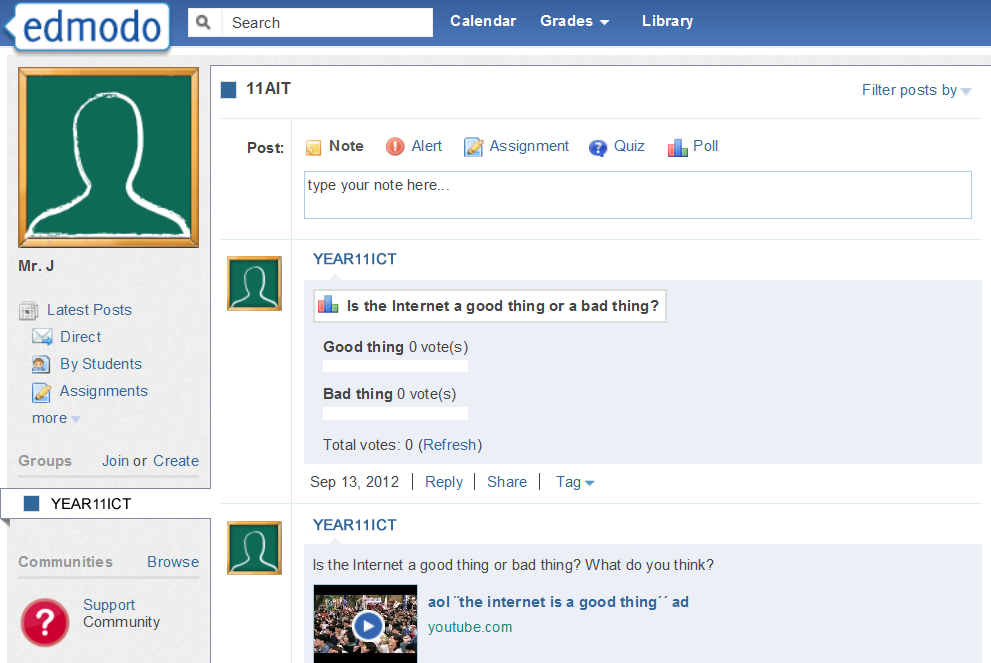 | 8. Edmodo Edmodo - edmodo.com - is a FREE 'Social Networking' environment for students, partents and teachers. It provides a safe and easy way for your class to connect and collaborate, share content, and access homework, grades and school notices. In fact, many schools are ditching their VLE's in preference to edmodo. Teachers and students can post messages, discuss topics, assign and grade work. Edmodo also allows you to share digital content such as links, pictures, videos, documents etc. Edmodo is very similar, in layout and functionality, to Facebook. This makes it immediately appealing to students. Edmodo is accessible online and from any mobile device via free smart phone applications. To get started visit: http://www.edmodo.com/ |
9. Infogr.am What are Infographics? According to Wikipedia: “Information graphics or infographics are graphic visual representations of information, data or knowledge.” Infographics are great for presenting data in captivating way! What is Infogr.am? Infogr.am is an online tool which enables you to easily create and share infographics. Infogr.am allows you to choose from a set of pre-defined templates which you are able to edit online. Once you have created your infographic, Infogr.am allows you to share it with others or embed it into your own website or VLE. Infogr.am also offer a PRO version which allows you to download your infographic as a high quality .PDF or .PNG file. Infogr.am also allows you to import your data directly from MS Excel or via .CSV file. Click here for a guide to creating inforgraphics using Infogr.am. | 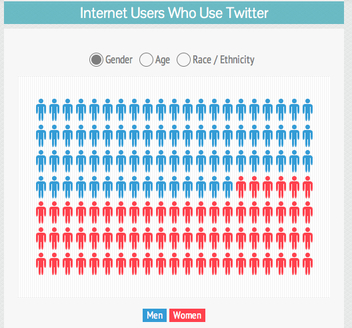 Infographic showing the demographics of Twitter users. |
10. Padlet
Padlet - www.padlet.com - (formerly WallWisher) is a free online collaboration tool. Described as a virtual sheet of paper, Padlet allows you to share images, videos and documents on virtual post-it notes.
How to use Padlet
How to use Padlet
- Make lists e.g. ingredients, keywords, or apparatus for the next lesson
- Brainstorm ideas
- Collect resources for a topic
- Create a collection of useful web links
- Facilitate a discussion
- Plan a project or event
- Gather feedback
- Create an online noticeboard
Create a virtual timeline with Padlet.
11/9/2013
Flip your classroom with blendspace

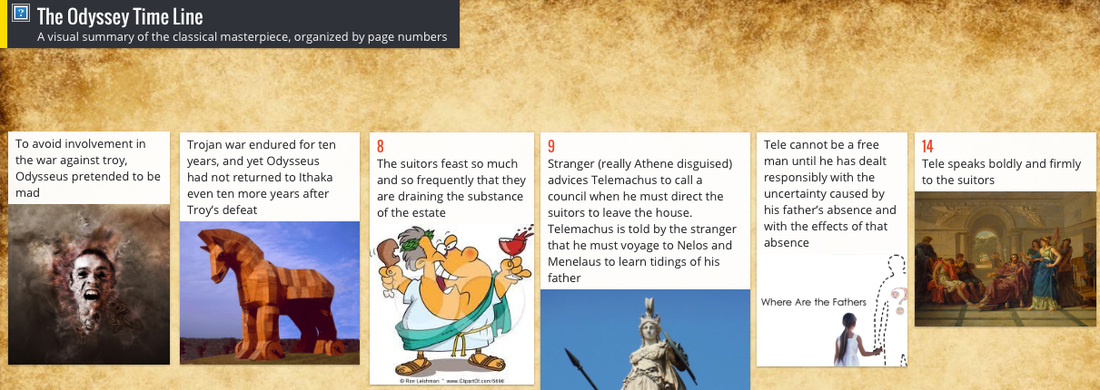
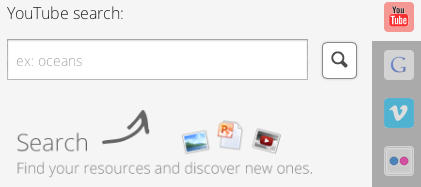
I was recently introduced to Blendspace (formerly Edcanvas) - https://www.blendspace.com - via a recommendation on edmodo and it has already changed the way that I teach! This powerful web 2.0 tool allows you to organize and share content such as videos, images, documents and text using its intuitive drag and drop interface. The tool also allows you to create online lessons by embedding content from popular sites such as YouTube, Google, Vimeo, Flickr etc via its built-in search tool. You can also upload content from your computer, Dropbox or Google Drive.
Blendspace is ideal for flipping your classroom – students can research a topic at home and use lesson time more effectively. As a teacher you can monitor students progress and measure students understanding with the built-in quiz creation tool. You can even check to see if your students have actually viewed the resources you have shared with them. Blendspace is also great for Project Based Learning (PBL) or differentiating learning.
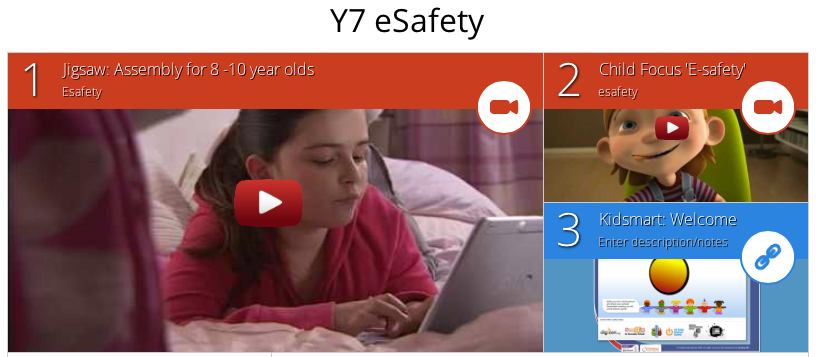
eSafety lesson created using blendspace
How to get started using blendspace:
This teachers guide will help you with setting up your first lesson and adding students
http://www.ncksec.net/docs/certified/examples/Edcanvas.pdf
This YouTube video will help you get started
YouTube video: Getting started with blendspace - http://www.youtube.com/watch?v=aQ_Mg3lSoew
This teachers guide will help you with setting up your first lesson and adding students
http://www.ncksec.net/docs/certified/examples/Edcanvas.pdf
This YouTube video will help you get started
YouTube video: Getting started with blendspace - http://www.youtube.com/watch?v=aQ_Mg3lSoew
Author
Simon Johnson
Microsoft Innovative Educator Expert / MIE Trainer
Minecraft Cert. Educator / Global Mentor
CAS Master Teacher
Raspberry Pi Cert. Educator

Tickle Ambassador
Archives
April 2017
October 2016
March 2016
August 2015
May 2015
February 2015
January 2015
November 2014
October 2014
April 2014
March 2014
February 2014
November 2013
September 2013
August 2013
July 2013
June 2013
May 2013
April 2013
June 2012
Categories
All App Creation Apps Computing Esafety Ipad Multimedia QR Social Media Web 2.0 Web 2.0
 RSS Feed
